Every list rots. People change jobs, abandon inboxes, or mistype their address at signup — and each dead address you mail is a bounce that chips away at your sender reputation. Email verification checks each address before you hit send, so the bounces never happen.
This guide walks you through connecting a verification service and cleaning a real list, start to finish. You'll need about ten minutes.
Before you start#
- A verification provider account and its API key. The platform ships drivers for 16 services — ZeroBounce, Reoon, Emailable, EmailListVerify, myEmailVerifier, Bouncify, NeverBounce, Kickbox, Debounce and more. Most hand out free trial credits, which is plenty to test with.
- A plan that includes email verification. If you hit "email verification servers are not included on your current plan" when saving, that's a plan quota, not a mistake on your side — ask your administrator to enable it.
- A list worth cleaning. Anything you imported from elsewhere, or haven't mailed in a few months, is a good candidate.
- A queue worker covering the right queues. Verification runs as a background job, and which queue it lands on depends on your provider (see Step 4). A worker started with
--queue=high,batch,default covers every case.
Step 1 — Open the Email verification screen#
In the left sidebar, under Sending, click Email verification. This is where every verification service you connect will live.
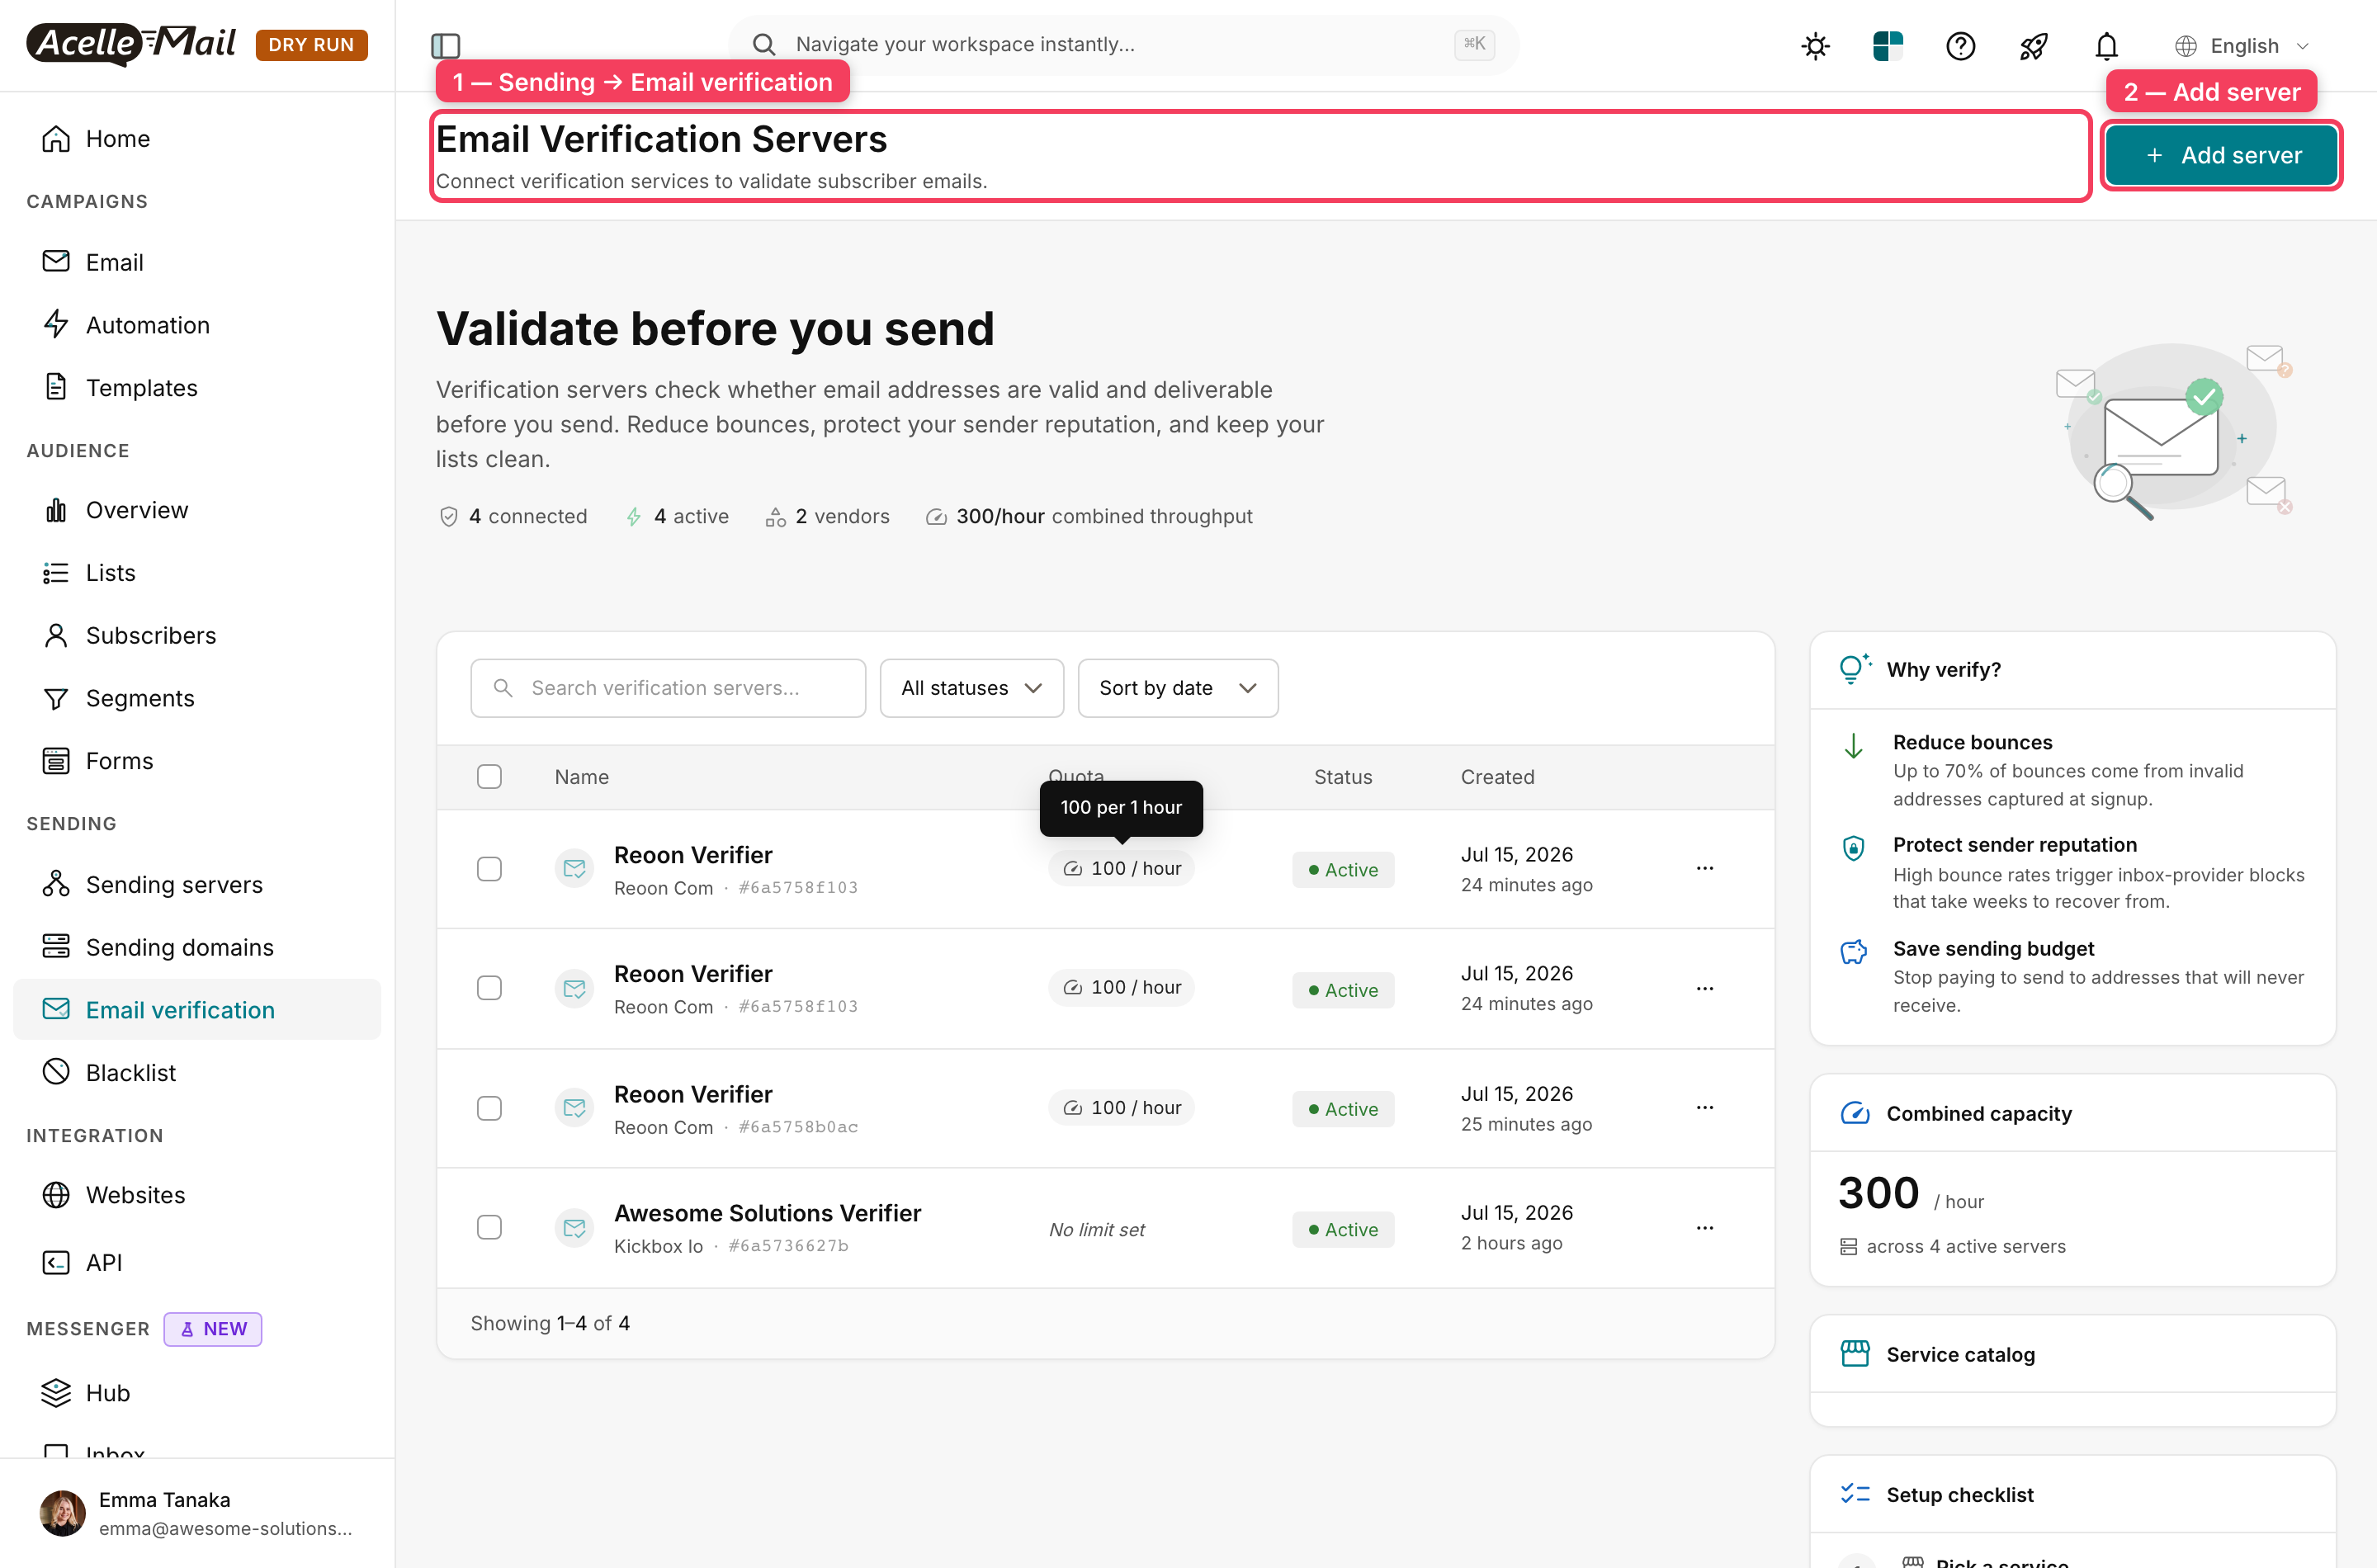
Click Add server (top right) to connect your first one.
Step 2 — Pick your verification service#
Fill in a Server name you'll recognise later, then choose your provider from the Verification service dropdown.
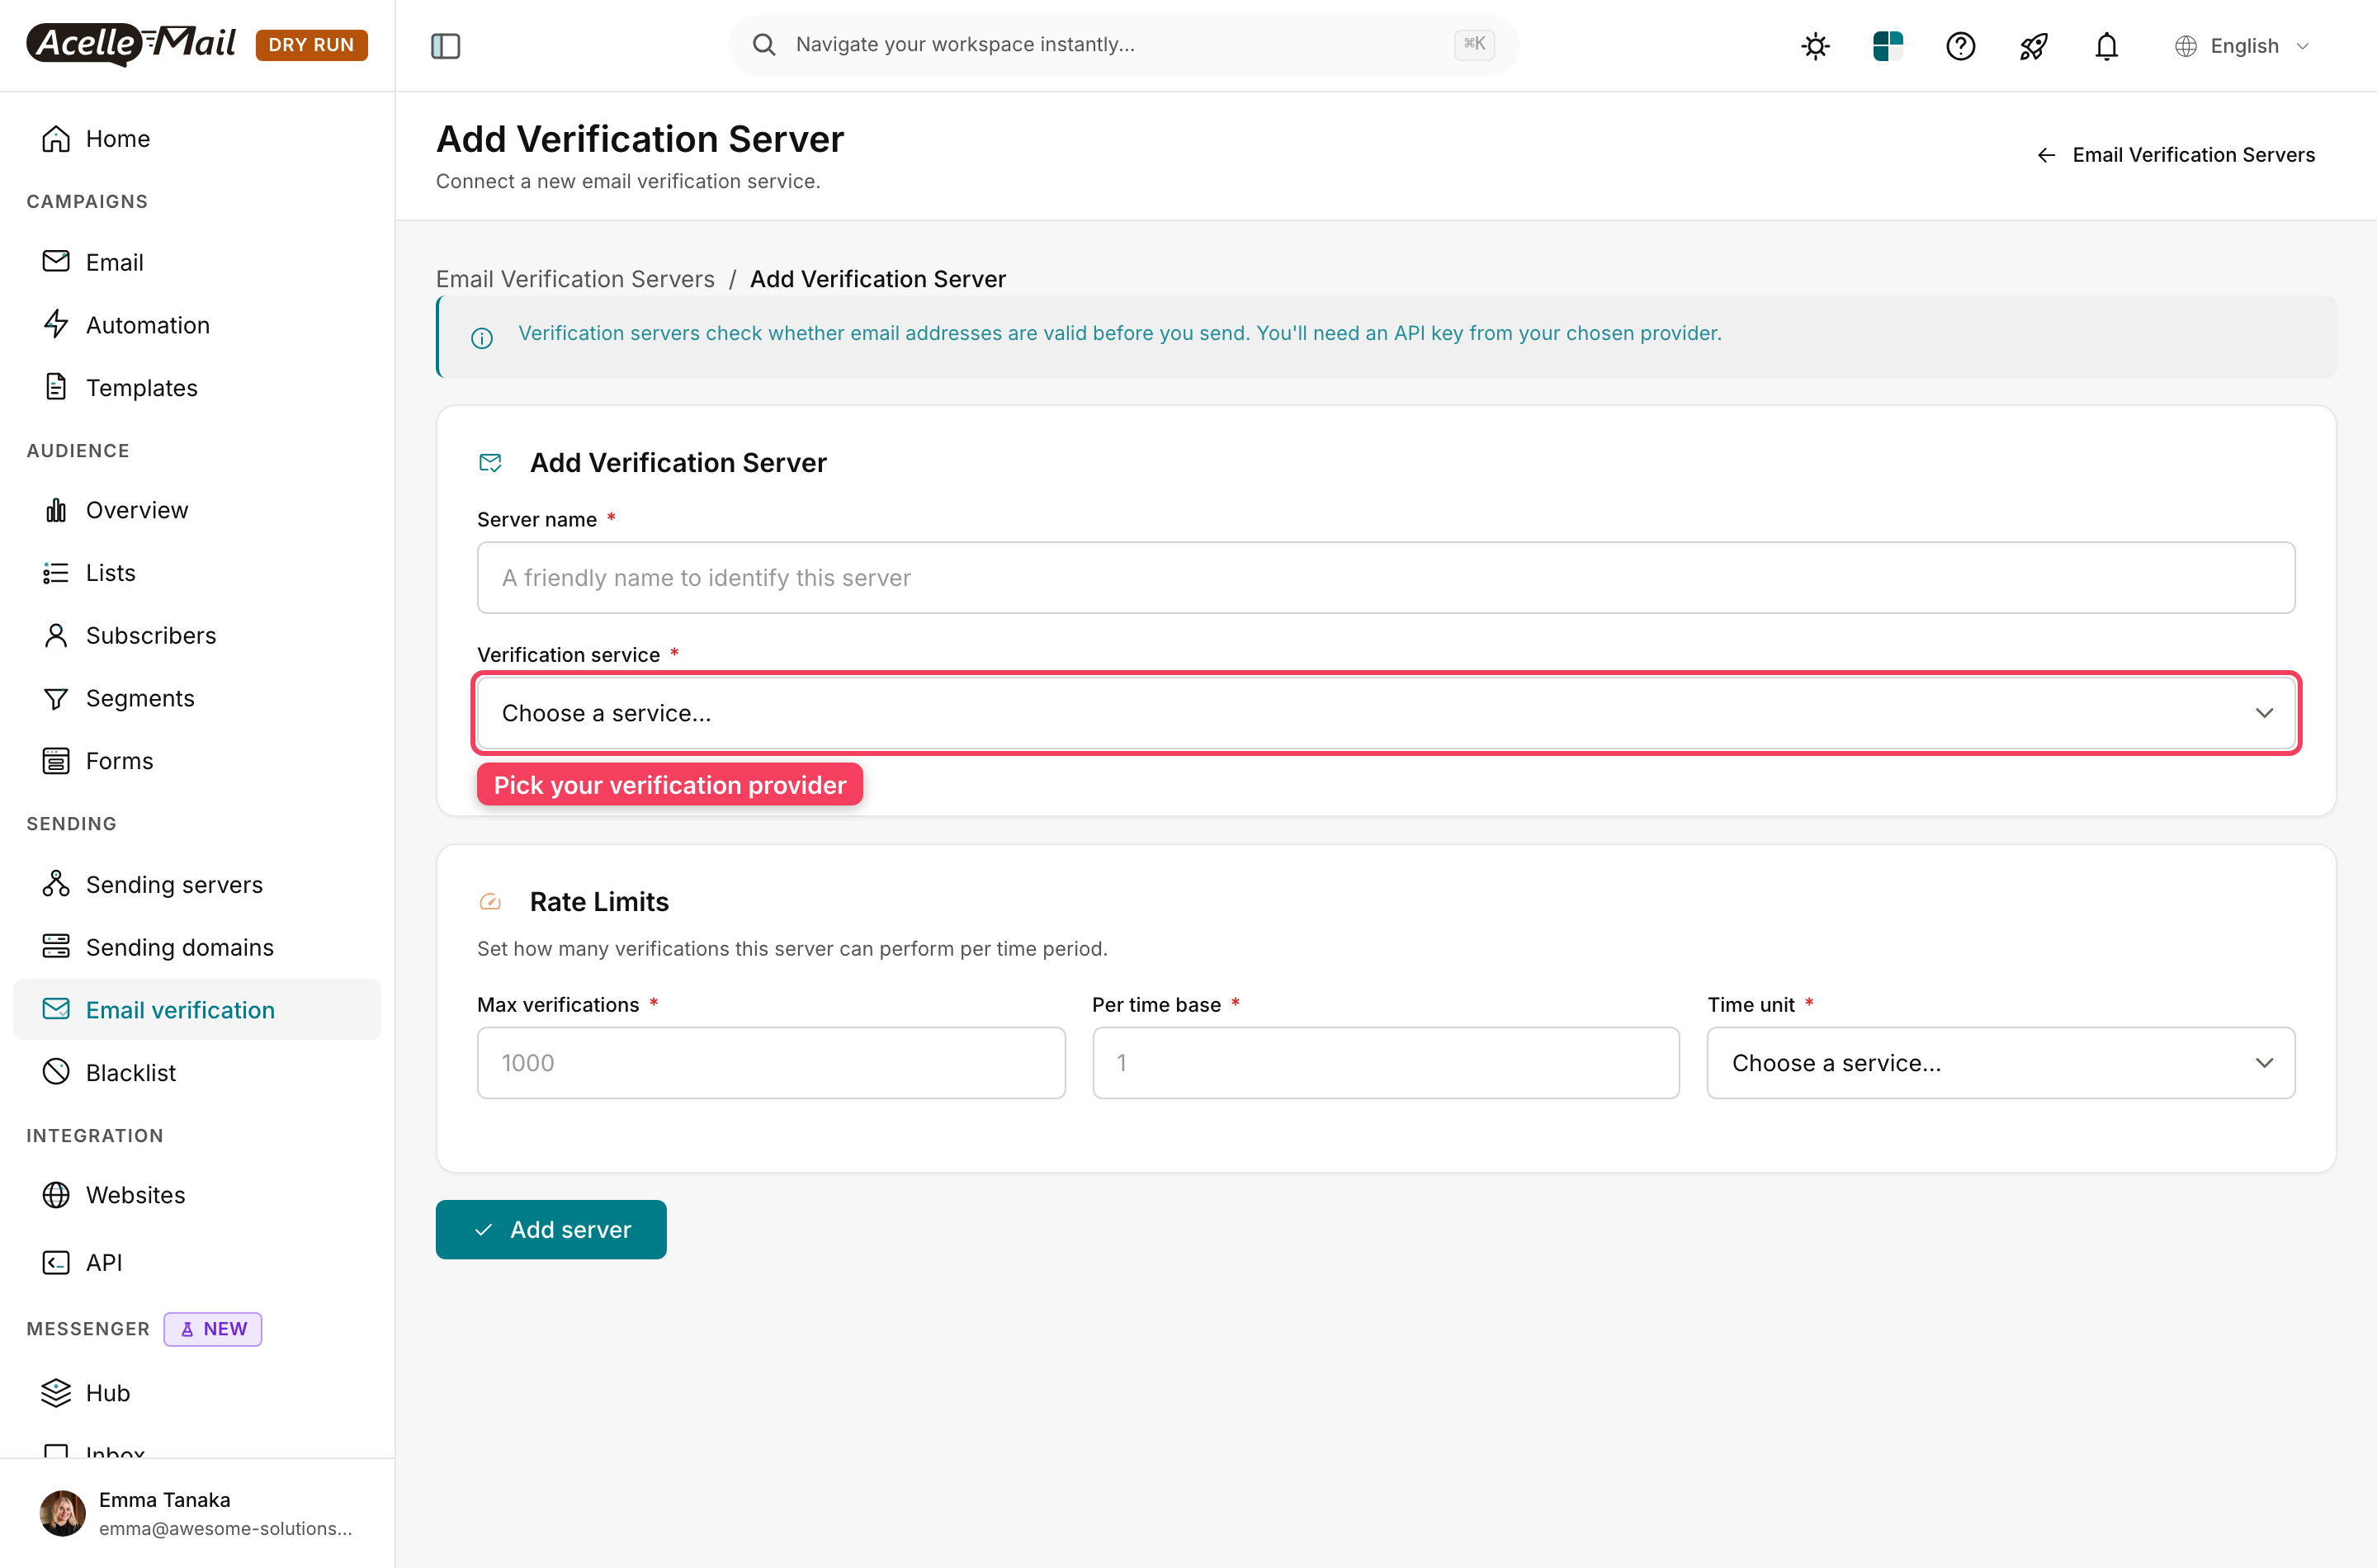
Server name, Verification service and Rate Limits are all there from the start. The one block that stays hidden is API Configuration — each provider asks for different credentials, so those fields only appear once you've picked a service.
Step 3 — Paste your API key and set a rate limit#
Choosing a service reveals the API Configuration block. Paste the API key from your provider's dashboard, then fill in Rate Limits.
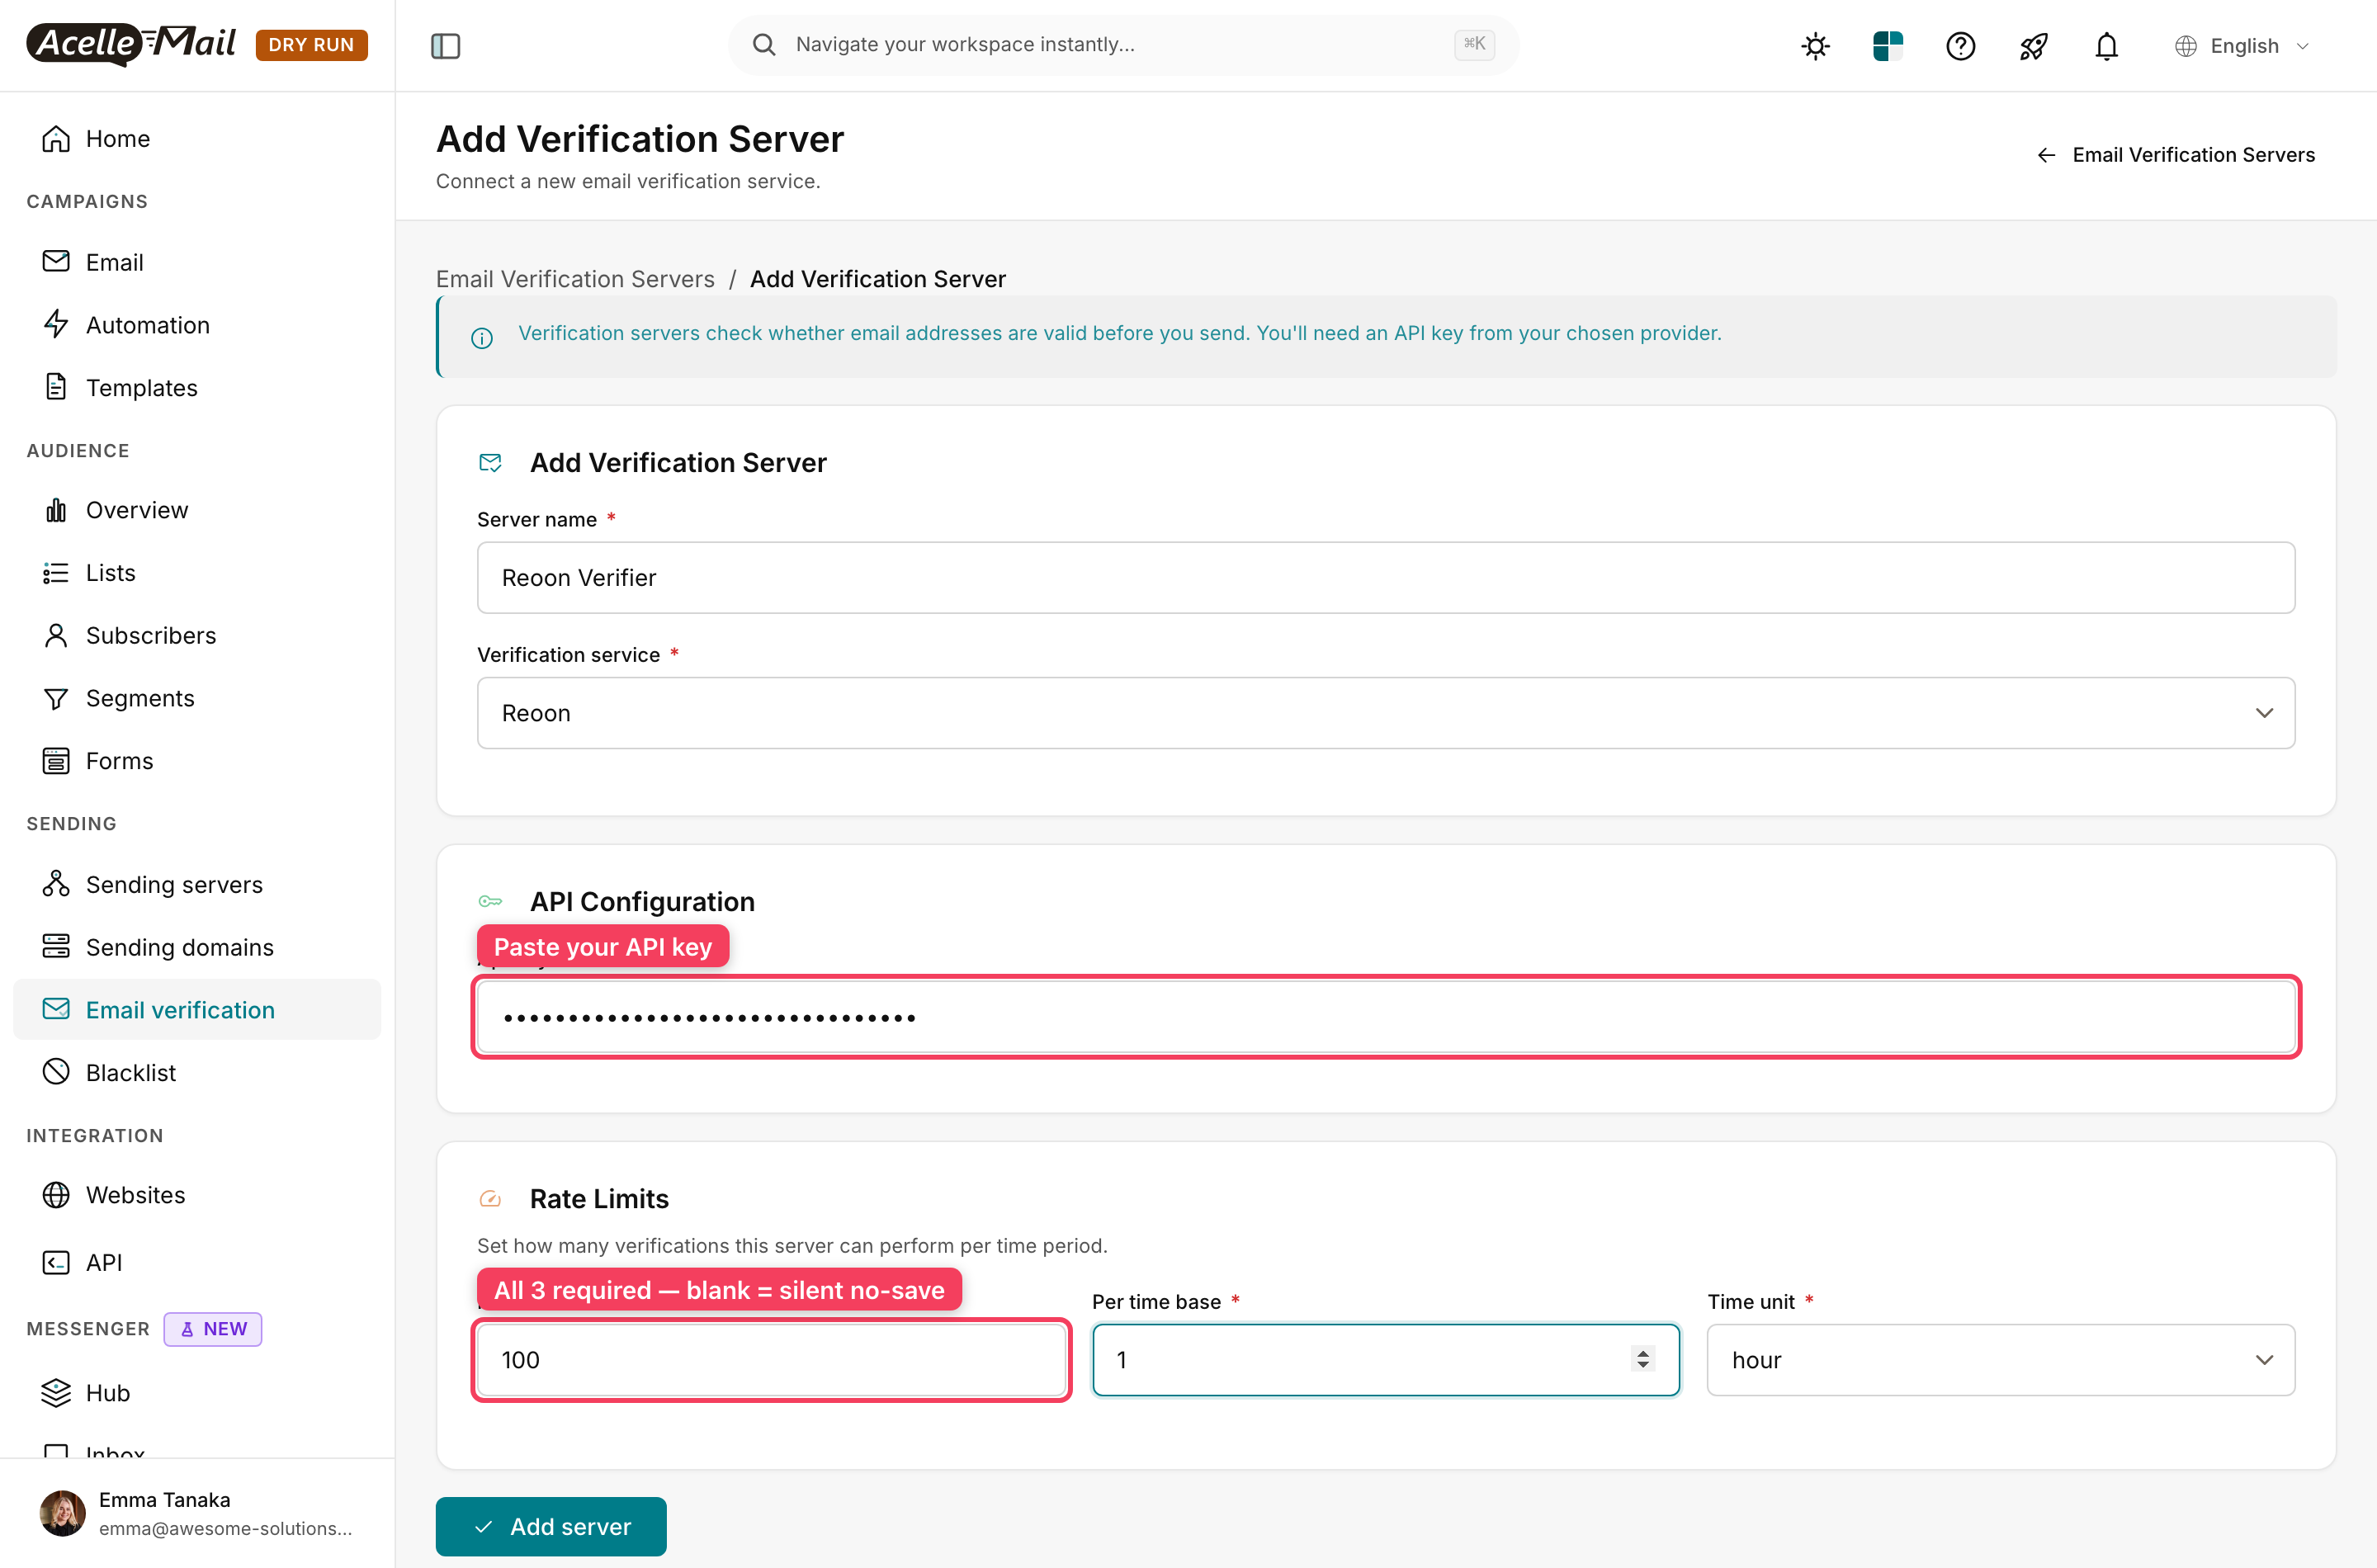
All three rate-limit fields are required, and they're the ones people miss — leave any of them blank and the form quietly refuses to save:
- Max verifications — how many addresses this server may check per period (100 is a sensible start).
- Per time base and Time unit — the period itself, e.g.
1 + hour.
Rate limits exist to protect your provider credits. If your provider gives you 20 checks a day, a runaway job on a 50,000-address list would burn through them in seconds.
The key isn't checked when you save. The form accepts any string. A wrong or empty key only surfaces when a run actually calls the provider — see Troubleshooting.
Click Add server. You'll land back on the list of verification servers with your new one on it.
Step 4 — Open your list and start the run#
Go to Audience → Lists, click the list you want to clean, then open its Email verification tab. Under Verification controls, pick the server you just created from Select verification server and click Start verification.
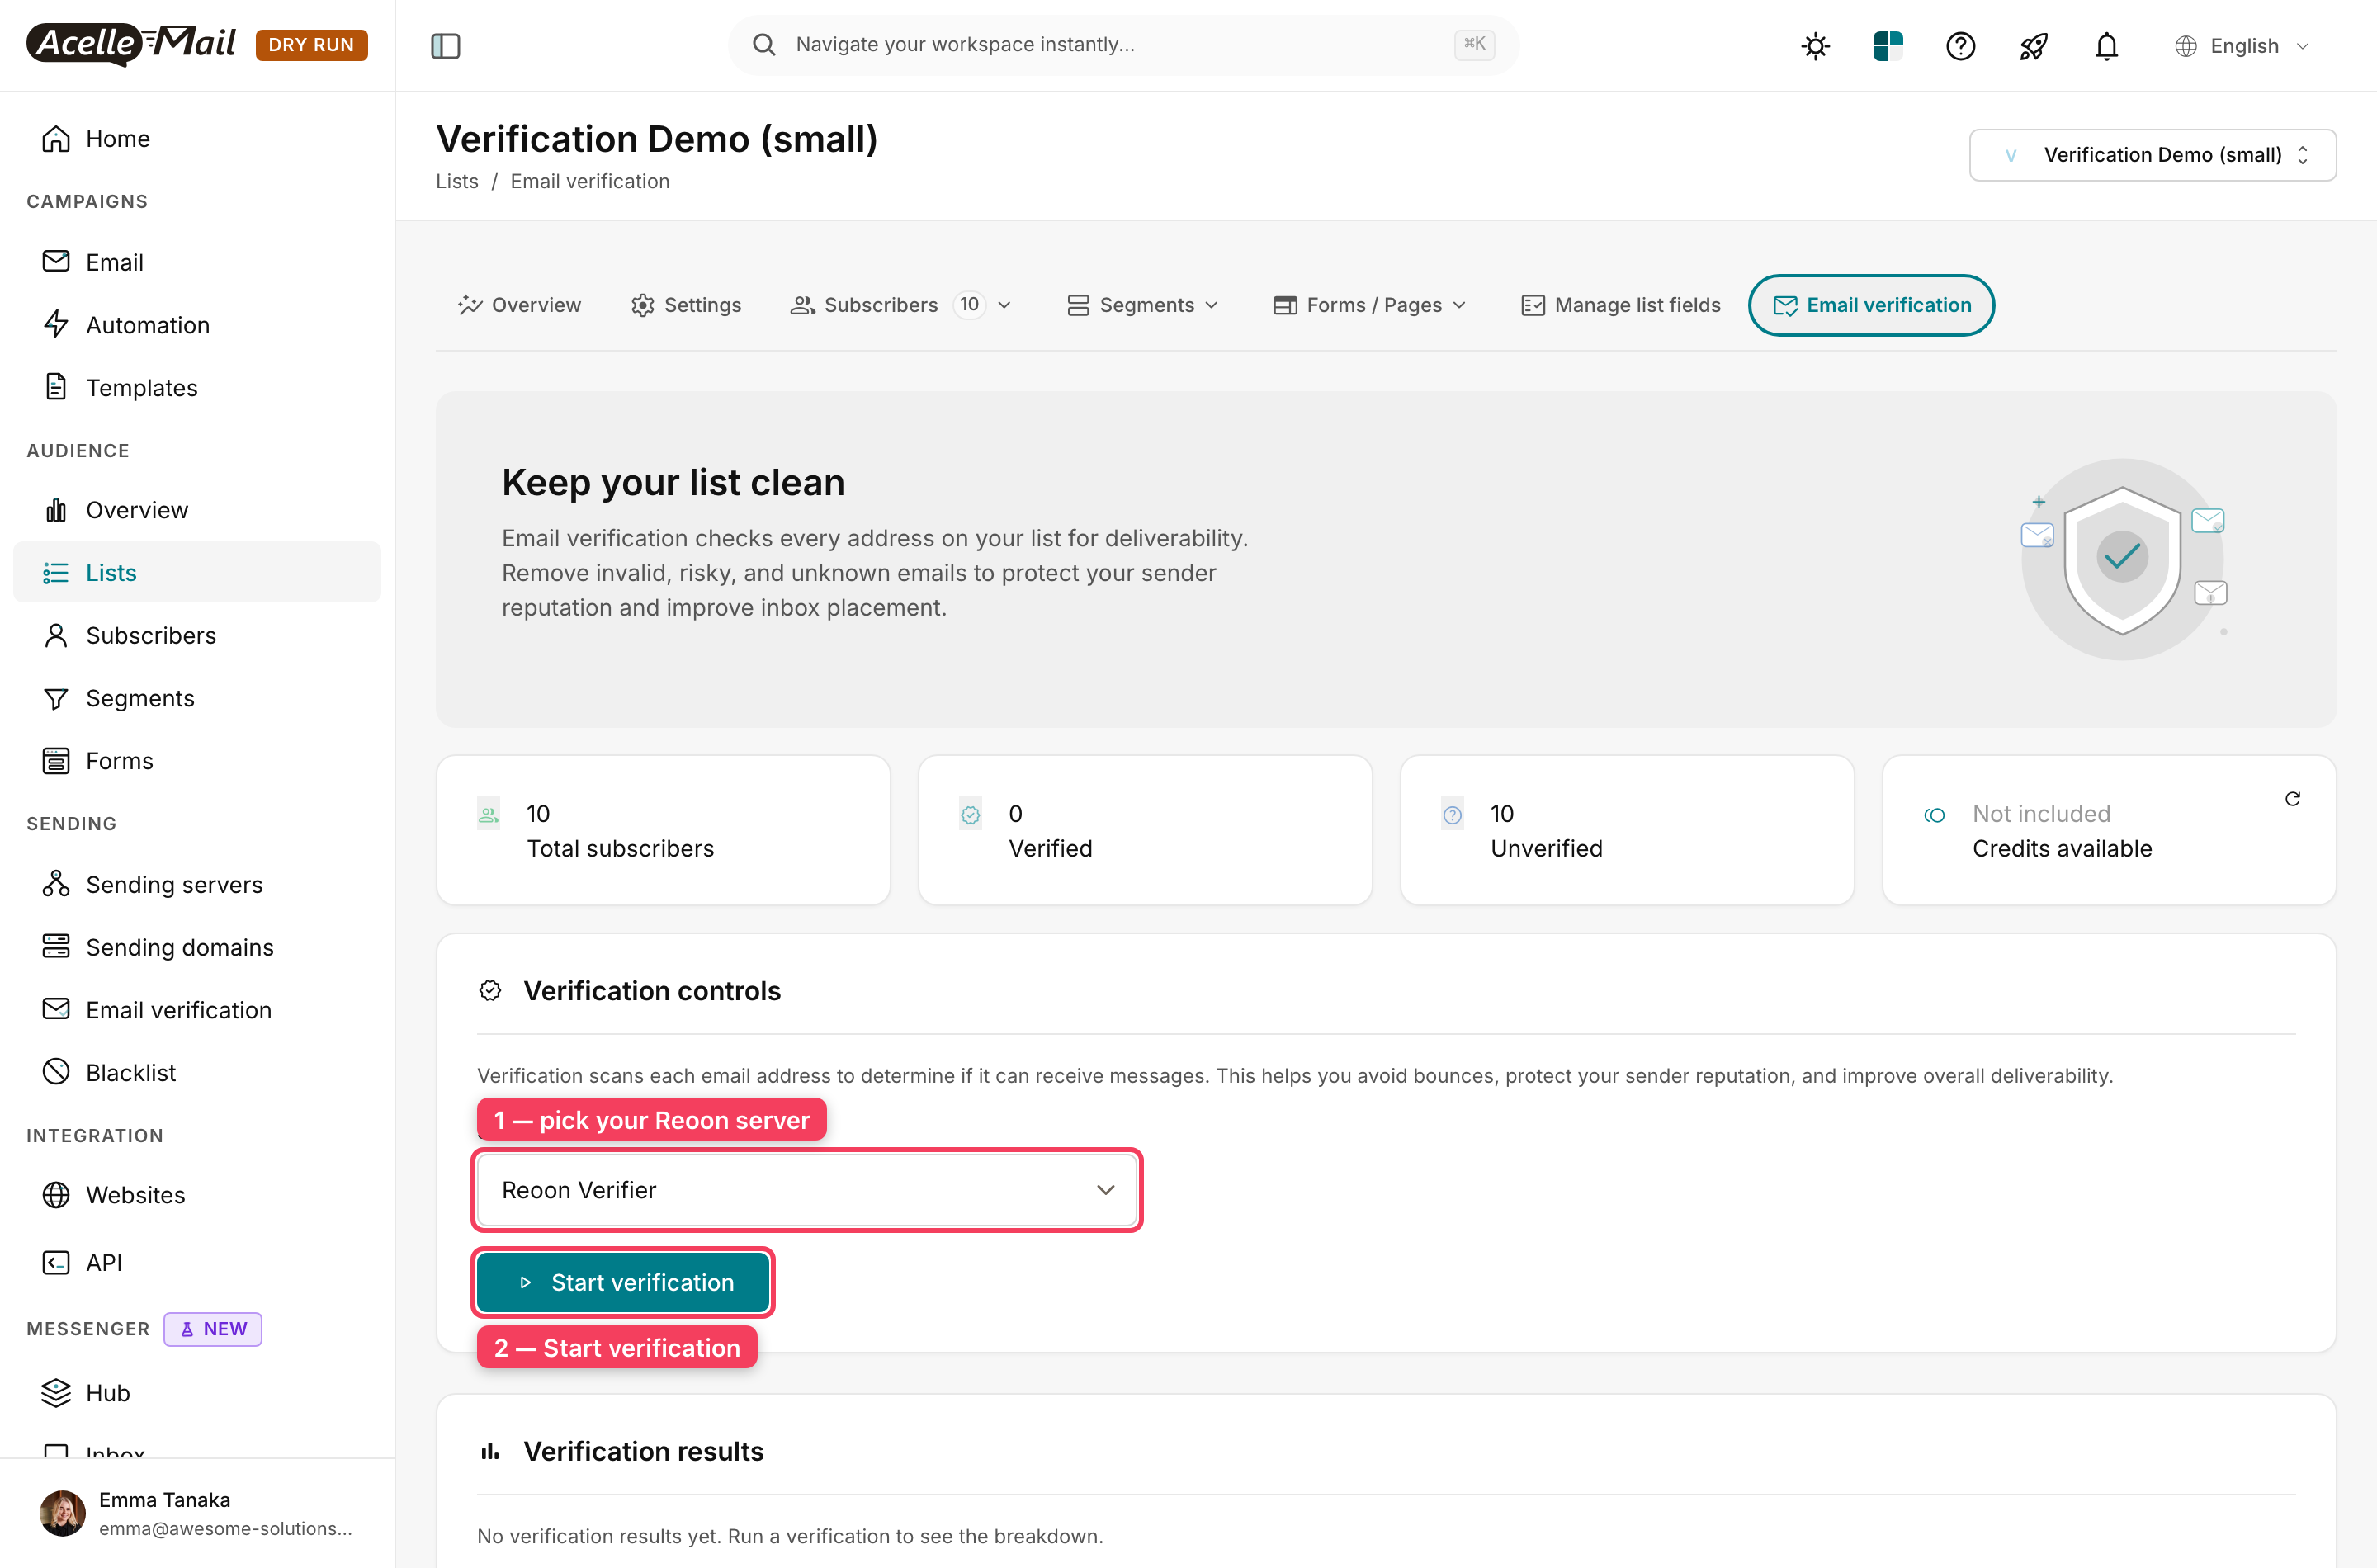
The counters at the top tell you where you stand before you spend a credit: how many subscribers the list holds, how many have been checked before, and how many are still unverified. A run only checks the unverified ones.
The run happens in the background — you'll see a progress bar climb rather than a frozen page, and you can leave and come back.
Which queue it uses depends on your provider. Services that support bulk verification — ZeroBounce, Reoon, Emailable, EmailListVerify, myEmailVerifier, Bouncify and NeverBounce — hand the whole list over in one API call and run on the high queue. The rest, Kickbox and Debounce among them, check addresses one at a time on the batch queue. That's why the worker in Before you start covers both.
Step 5 — Read the results#
When the bar reaches 100%, Verification results breaks your list into four buckets:
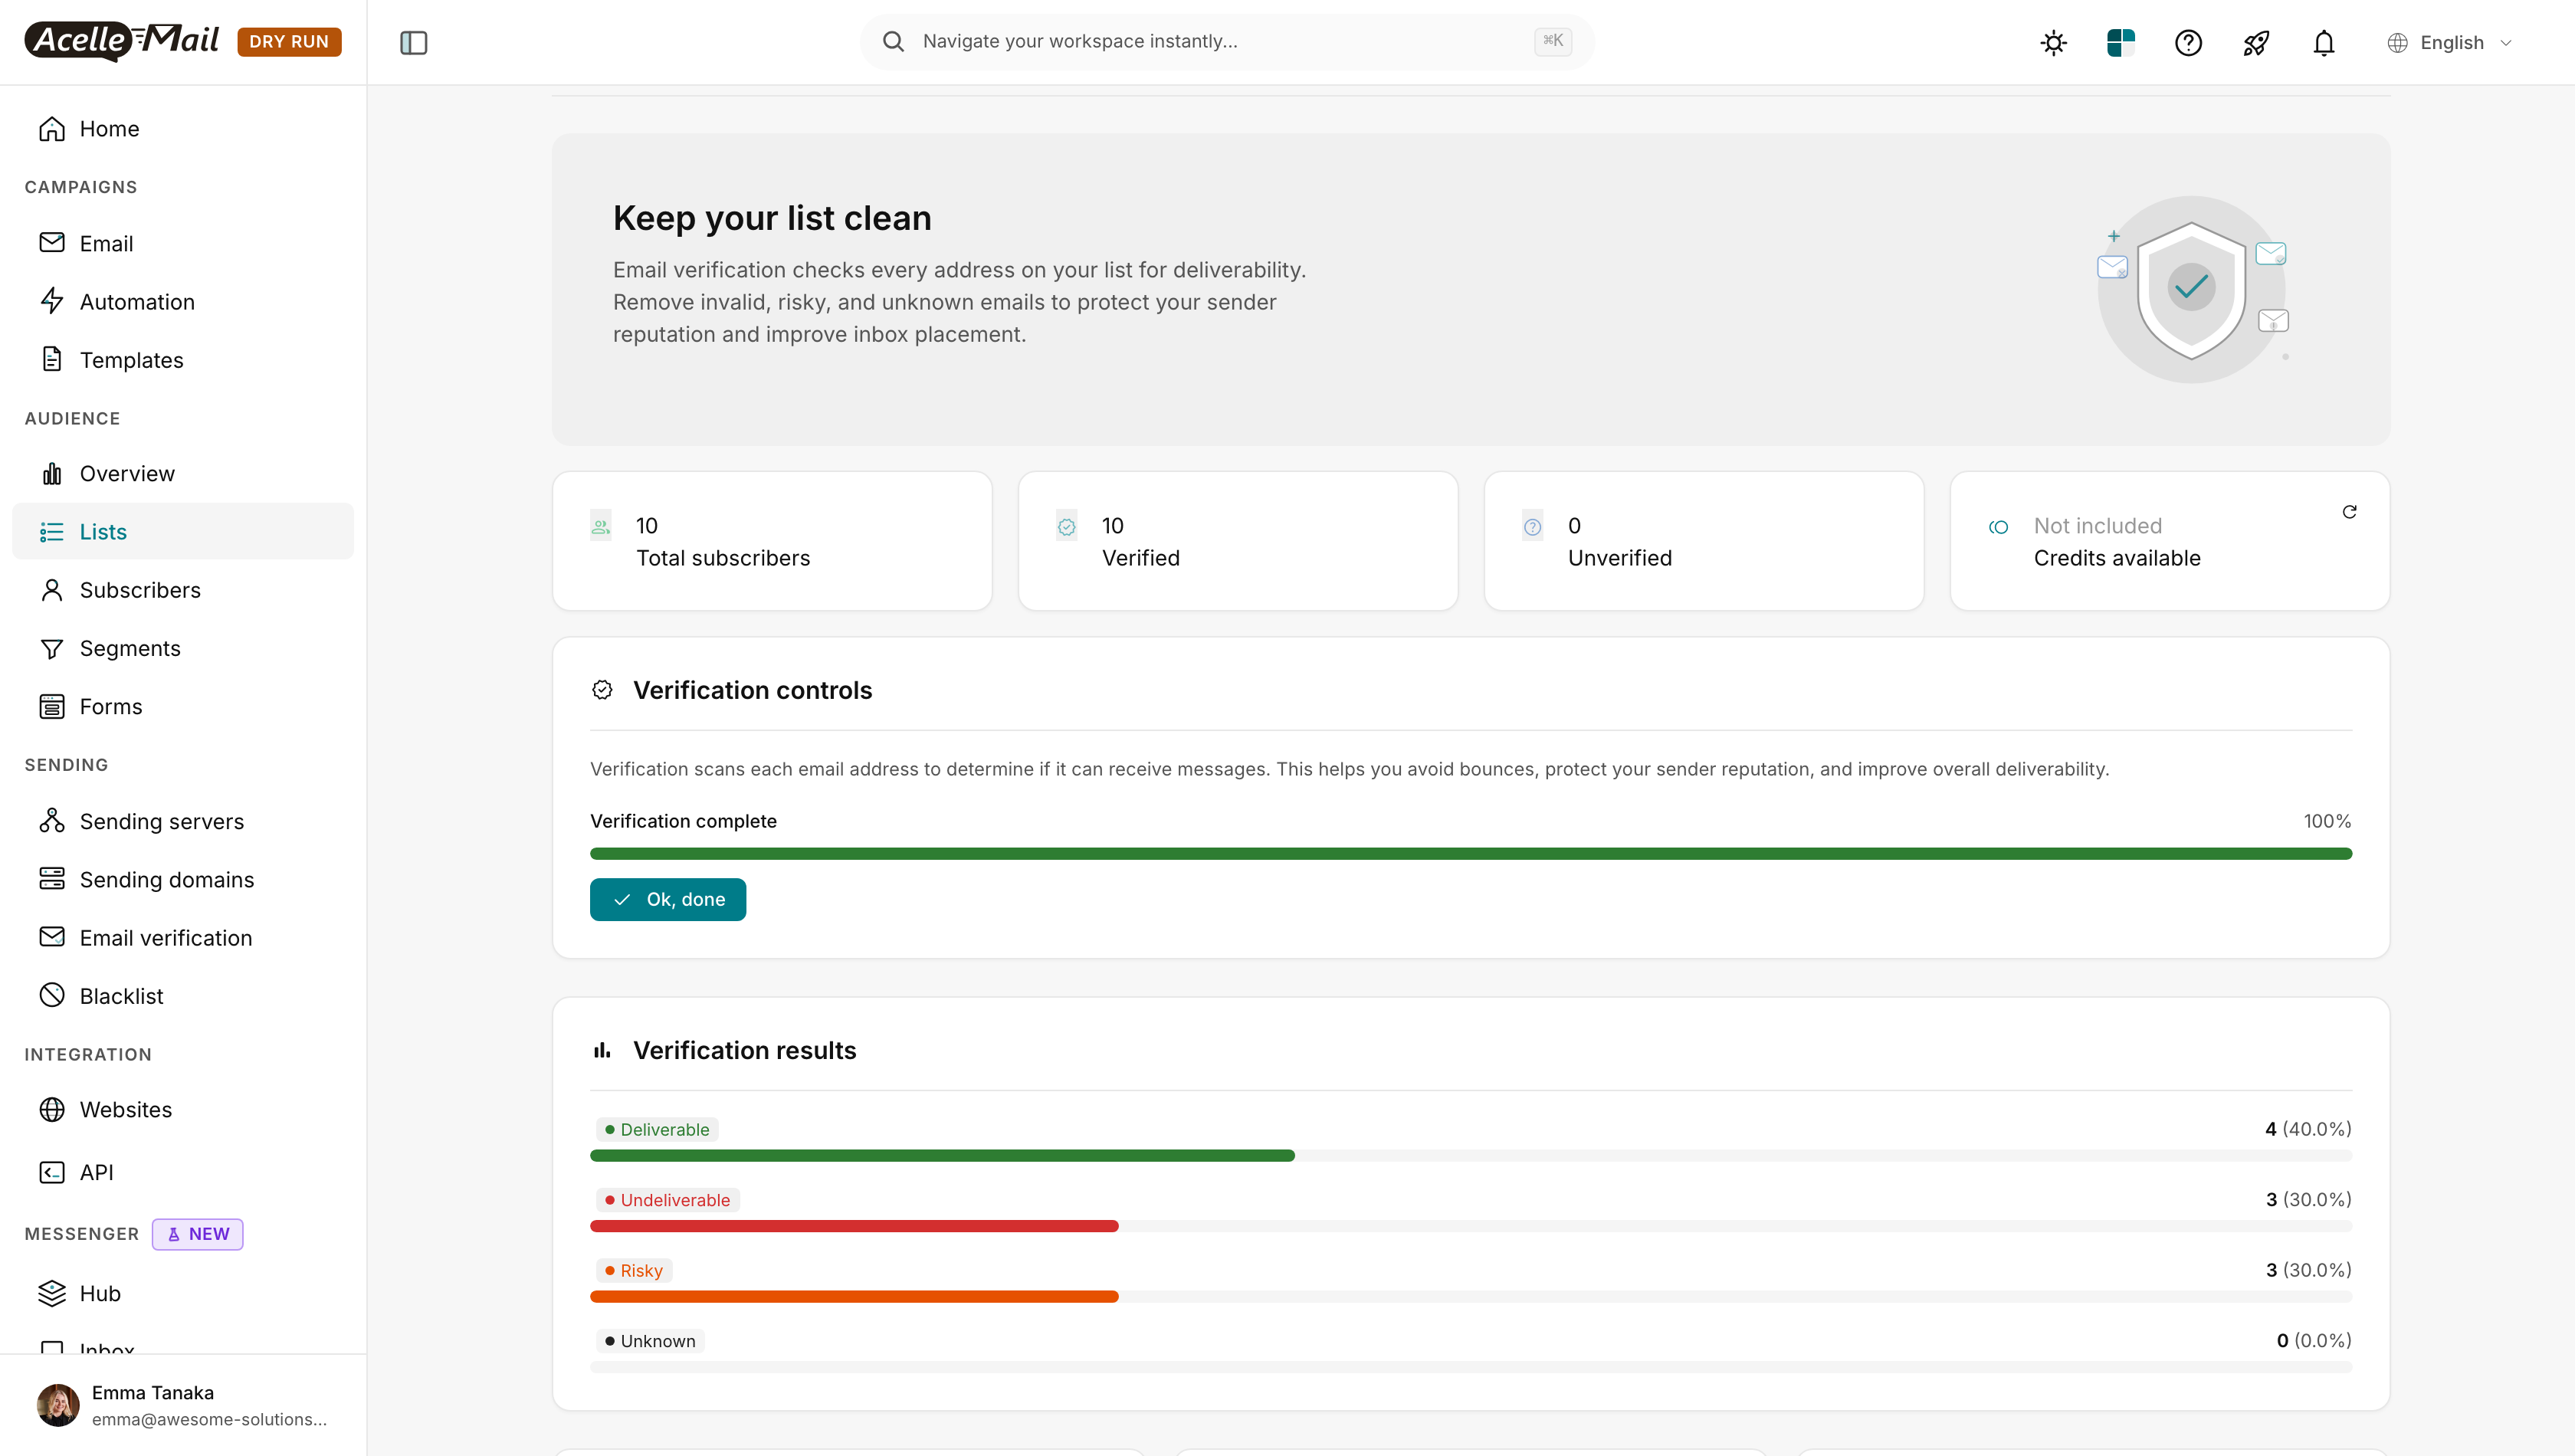
- Deliverable — the mailbox exists and accepts mail. Keep these.
- Undeliverable — the domain or the mailbox doesn't exist. These are guaranteed bounces. Remove them.
- Risky — the address resolves, but something's off: a catch-all domain that accepts everything, a disposable address, or a likely typo. Judgement call.
- Unknown — the provider couldn't get a definitive answer, usually a server that wouldn't respond. Re-check these later.
In the run above, ten addresses split 40% deliverable, 30% undeliverable, 30% risky. That undeliverable 30% is exactly what you didn't just mail.
Need to run the whole list again — after a re-import, or to re-check a batch of Unknowns? Reset verification data at the bottom of Verification controls clears every verdict, so the next run treats the list as unverified again. It asks "Reset all verification data? This cannot be undone." first, and it does mean spending the credits a second time.
Step 6 — Act on what you found#
Open the list's Subscribers tab and you'll see the verdict on each address:
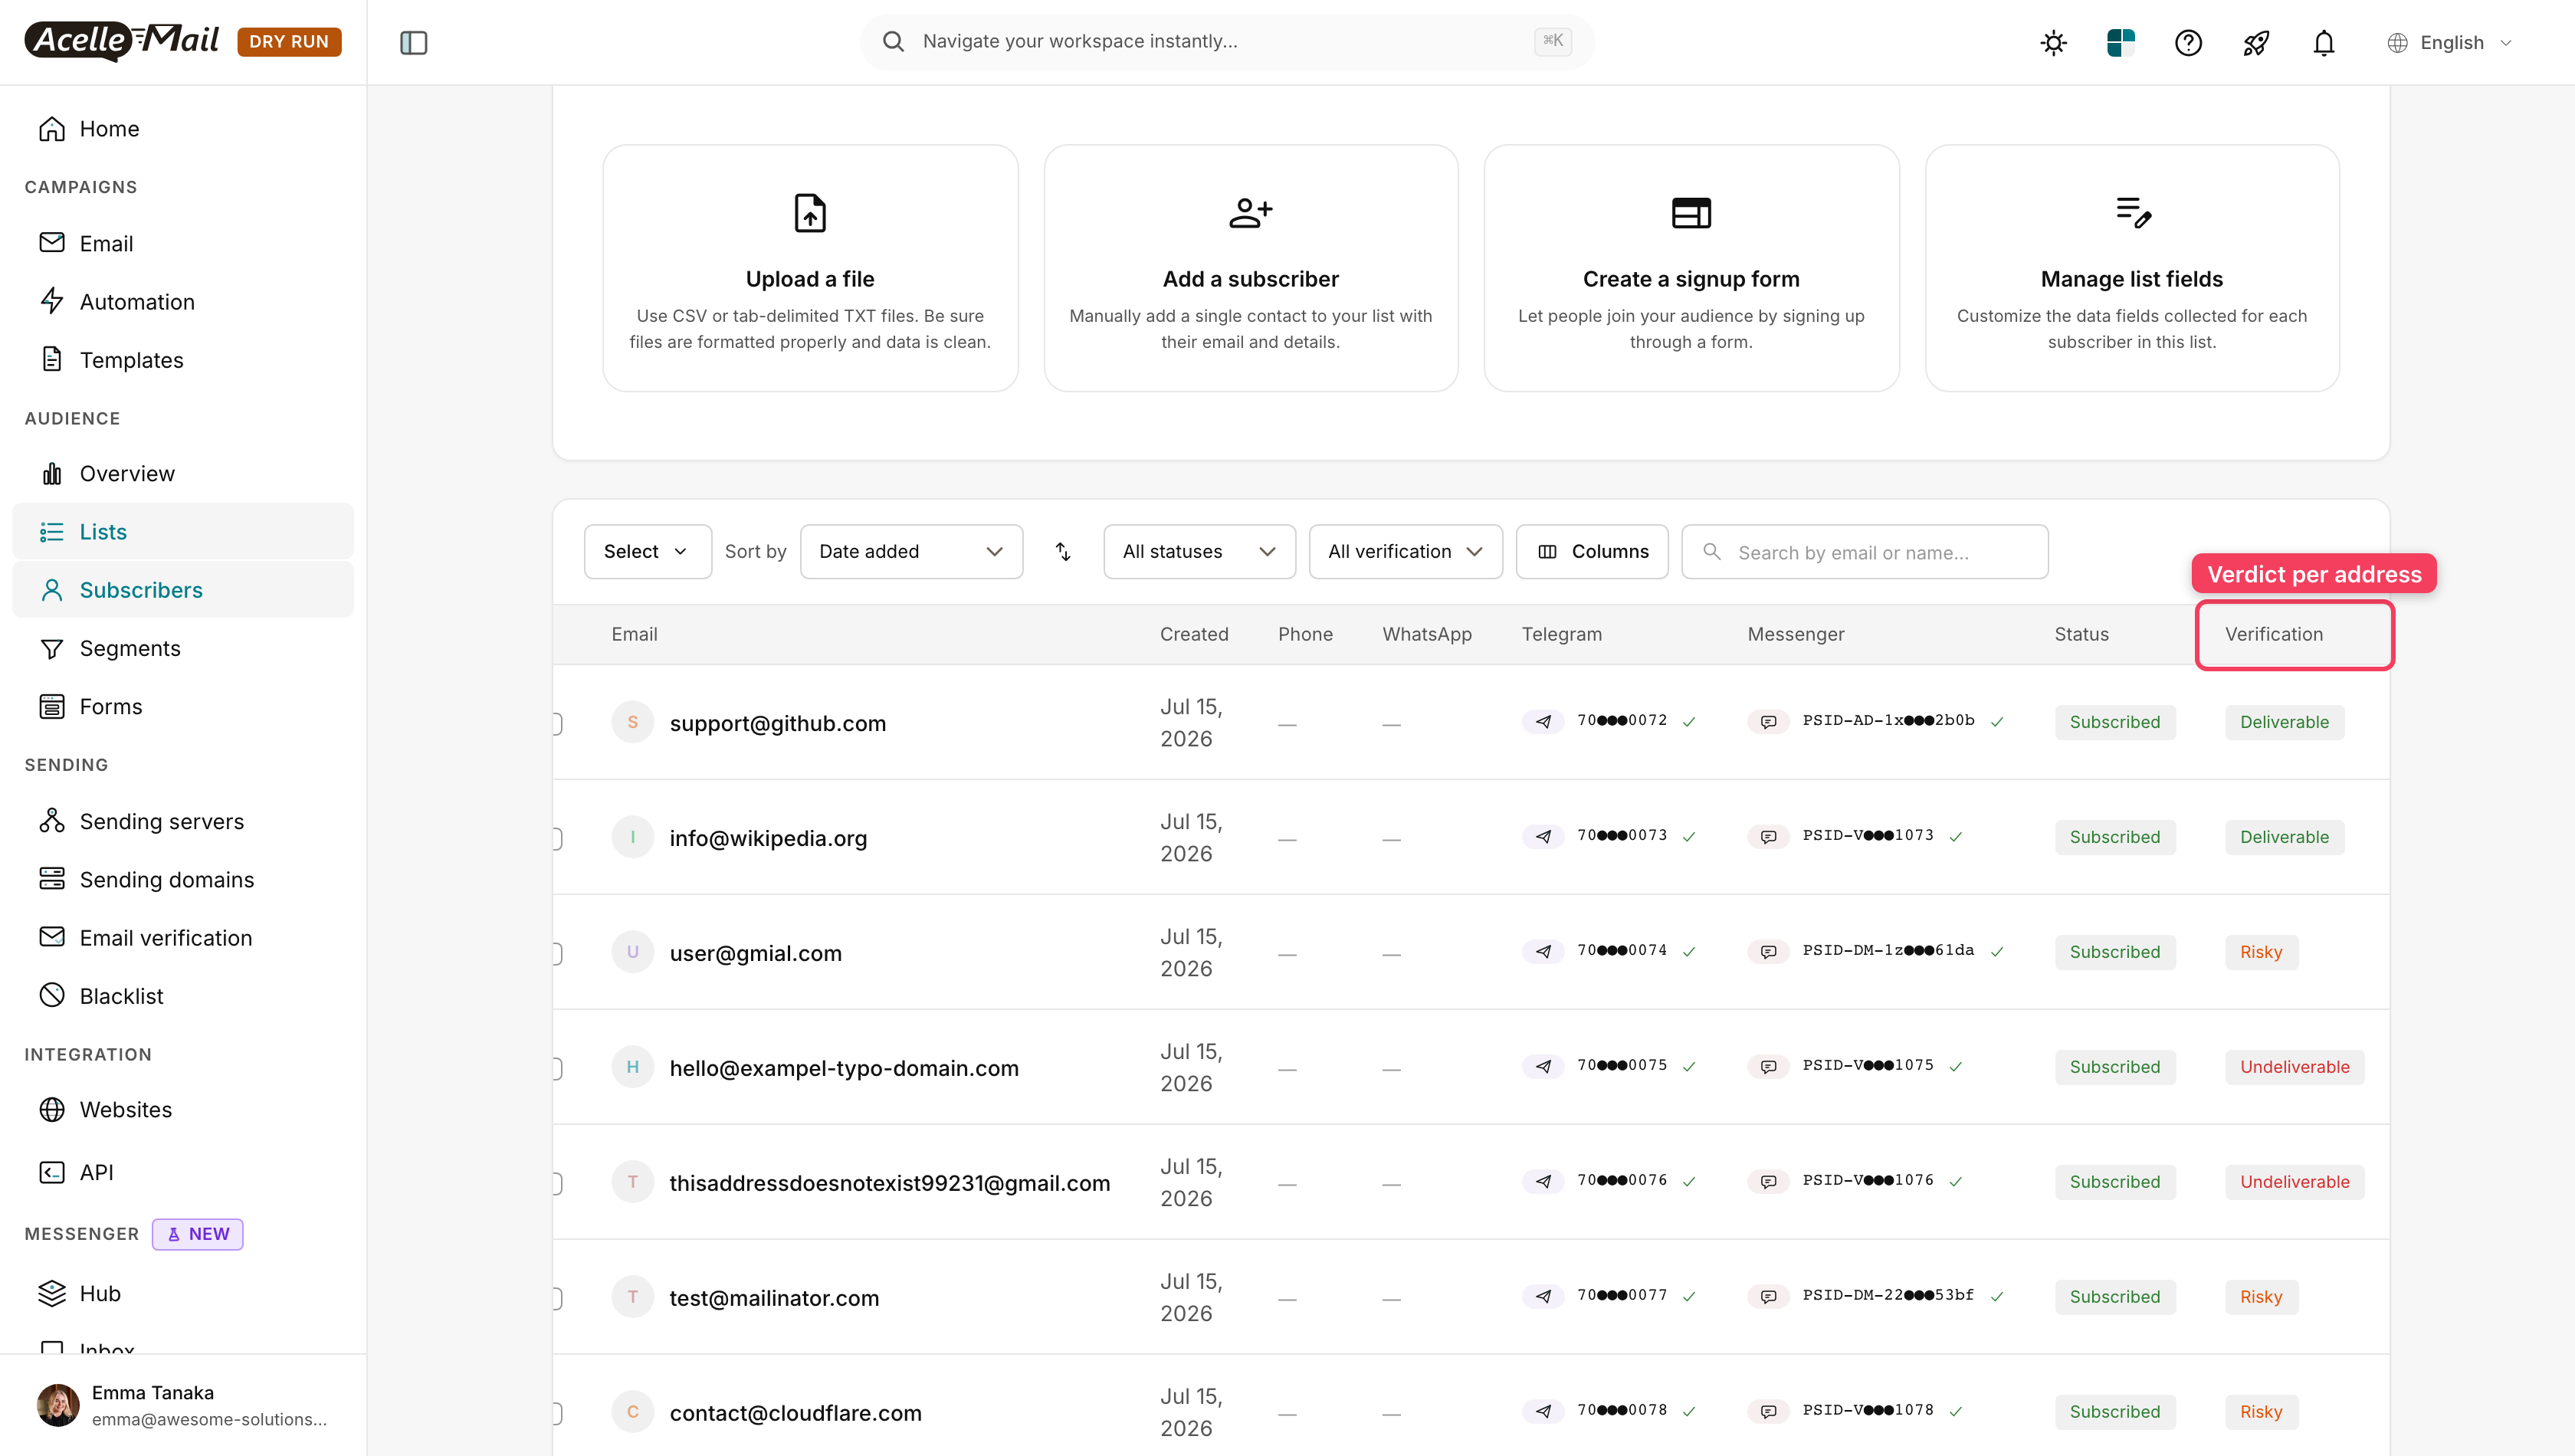
To act on a whole bucket at once: set the verification filter in the toolbar to Undeliverable, tick the checkbox in the table header to select every matching subscriber, then choose an action from the Select menu.
Delete is permanent. The confirmation says so plainly — "This will permanently remove the selected subscribers and all their data. This cannot be undone." If you'd rather keep the record, Blacklist stops them being mailed and blocks the address across all your lists.
A sane policy for most senders:
- Undeliverable — remove them. There's no upside to keeping an address that cannot receive mail.
- Risky — usually worth holding back from your main sends. Disposable addresses will never engage; a catch-all might be fine. If a risky address is an obvious typo like
[email protected], the person meant gmail.com — worth a manual fix.
- Deliverable — mail with confidence.
Re-verify every few months, and always after importing a list from somewhere else. For the wider routine this fits into, see Email list hygiene: clean your list for better deliverability.
Troubleshooting#
"Email verification servers are not included on your current plan." A plan quota, not a form error. Your plan needs email verification enabled before you can add a server.
"Reoon: missing api_key in server options." Every driver throws this same shape — your provider's name, then the message. It appears when a run starts, not when you save the server, because the key is only read at call time. Reopen the server and re-paste the key, checking for a trailing space.
The run finishes and everything is Unknown. A key that's present but wrong looks exactly like this: the provider rejects the call and the driver has no verdict to record. Confirm the key in your provider's dashboard, and check you haven't run out of credits, before re-running.
The progress bar sits at 0% and nothing happens. The job is queued but no worker is consuming that queue. Check which queue your provider uses (Step 4), then start a worker that covers it — --queue=high,batch,default covers both paths.
The run slows to a crawl on a big list. Your rate limit is a run-time throttle, not just a form field. A limit of 100 per hour on a 5,000-address list means the run paces itself over days rather than failing — that's working as intended. Raise the limit only as far as your provider plan actually allows.
Recap#
You connected a verification service, cleaned a real list, and turned a pile of unknown addresses into a clear keep / remove / decide split — before a single bounce hit your reputation.
The habit that keeps it working: verify after every import, re-verify quiet lists a few times a year, and remove undeliverables the same day you find them. Next, it's worth understanding what different bounce types actually mean and how to monitor your sender reputation over time.
