What this is for#
A survey funnel is a page with your questions, followed by a thank-you page. You share its address, or send each subscriber a personal link in a campaign, and every answer lands on one results screen.
Before you start#
- FUNNELS in the left menu. If it is not there, see Common issues.
- For personal links (Step 10): a mailing list with subscribers, and a campaign to send them. Your first email campaign walks through one.
Step 1 — Open Funnels and click Create funnel#
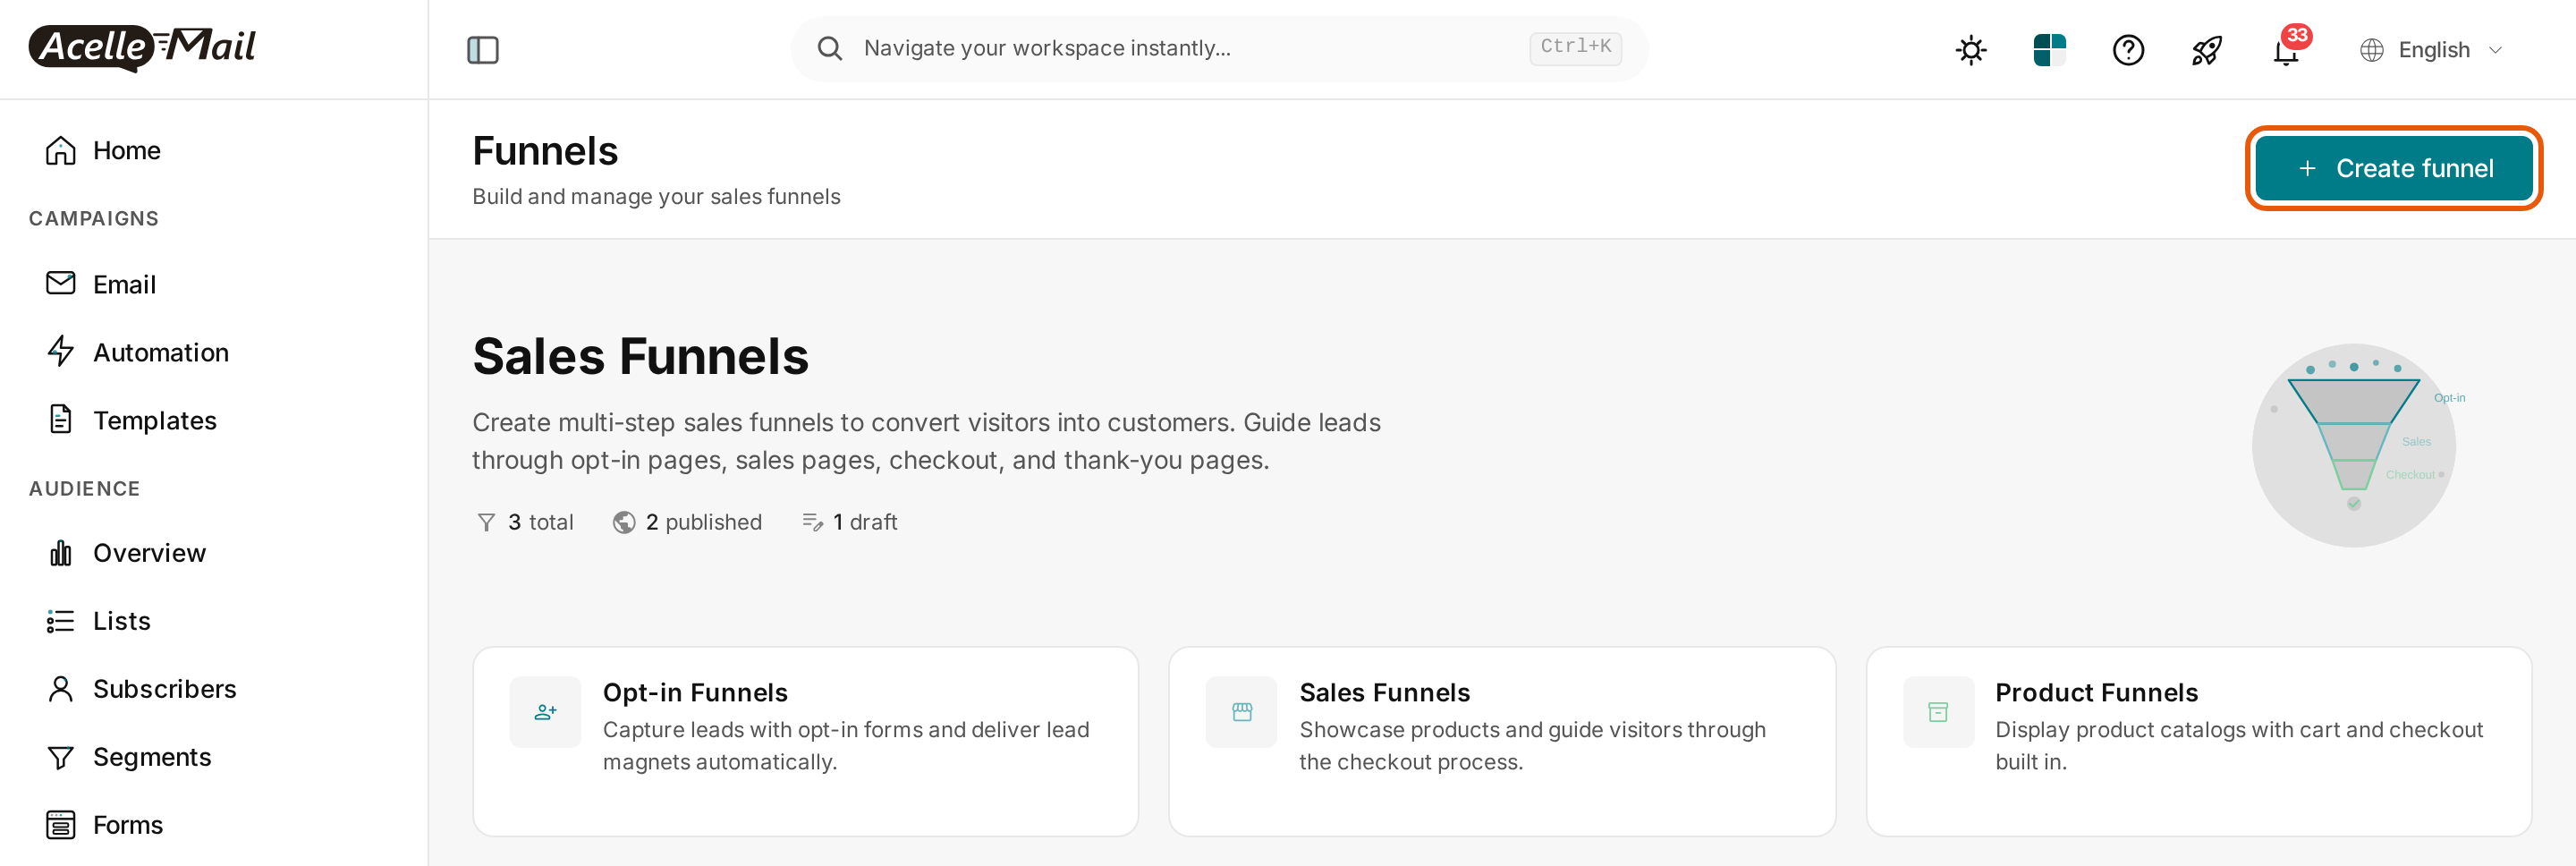
In the left menu, under FUNNELS, click Funnels. The page lists your funnels. Click Create funnel in the top right.
Step 2 — Pick the Survey Funnel template and name it#
The Create funnel page shows one card per template. Click Survey Funnel — Collect feedback or qualify leads with a survey page, then a thank you page. A window opens with the template you picked. Type a name in Funnel name, for example Customer Feedback Survey, and click Create.
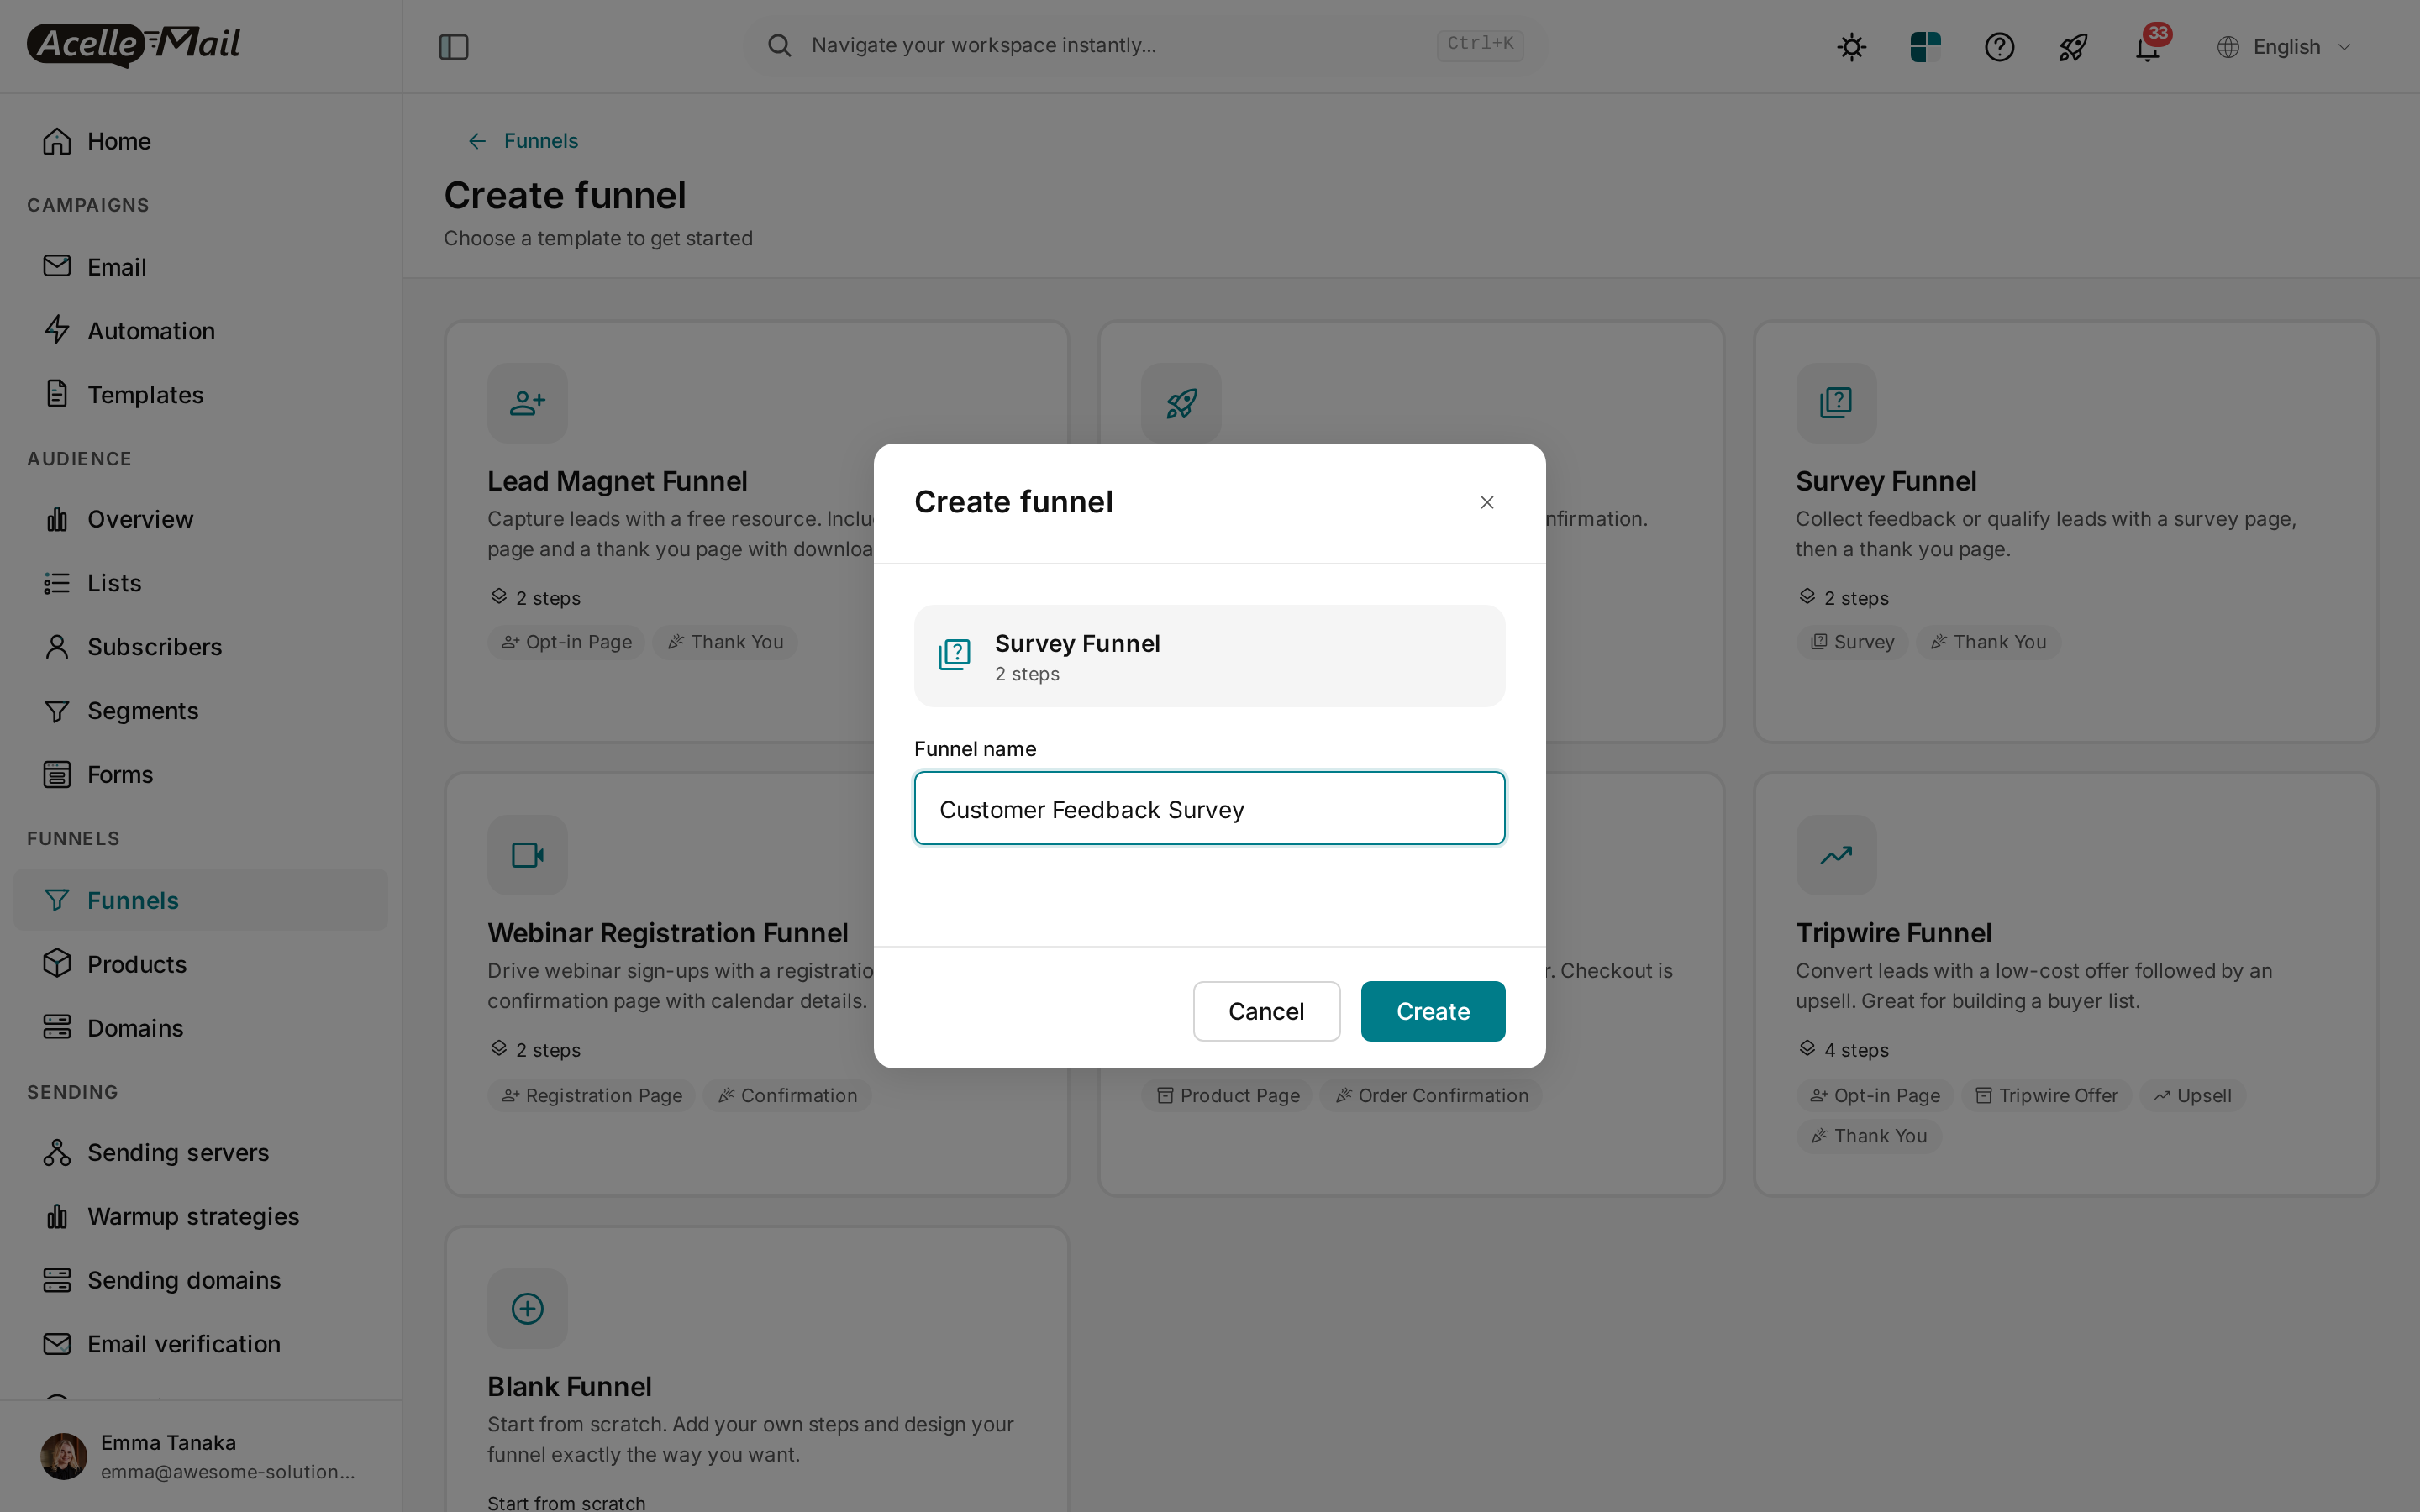
The name also becomes the funnel's address: Customer Feedback Survey is served at /f/customer-feedback-survey.
Step 3 — Look at the funnel's steps#
The funnel opens on its Steps tab with two pages: Survey and Thank You. Under the Survey step, a line counts its questions and responses — 3 questions · no responses yet — next to two buttons, Manage questions and Survey results. Click Manage questions.
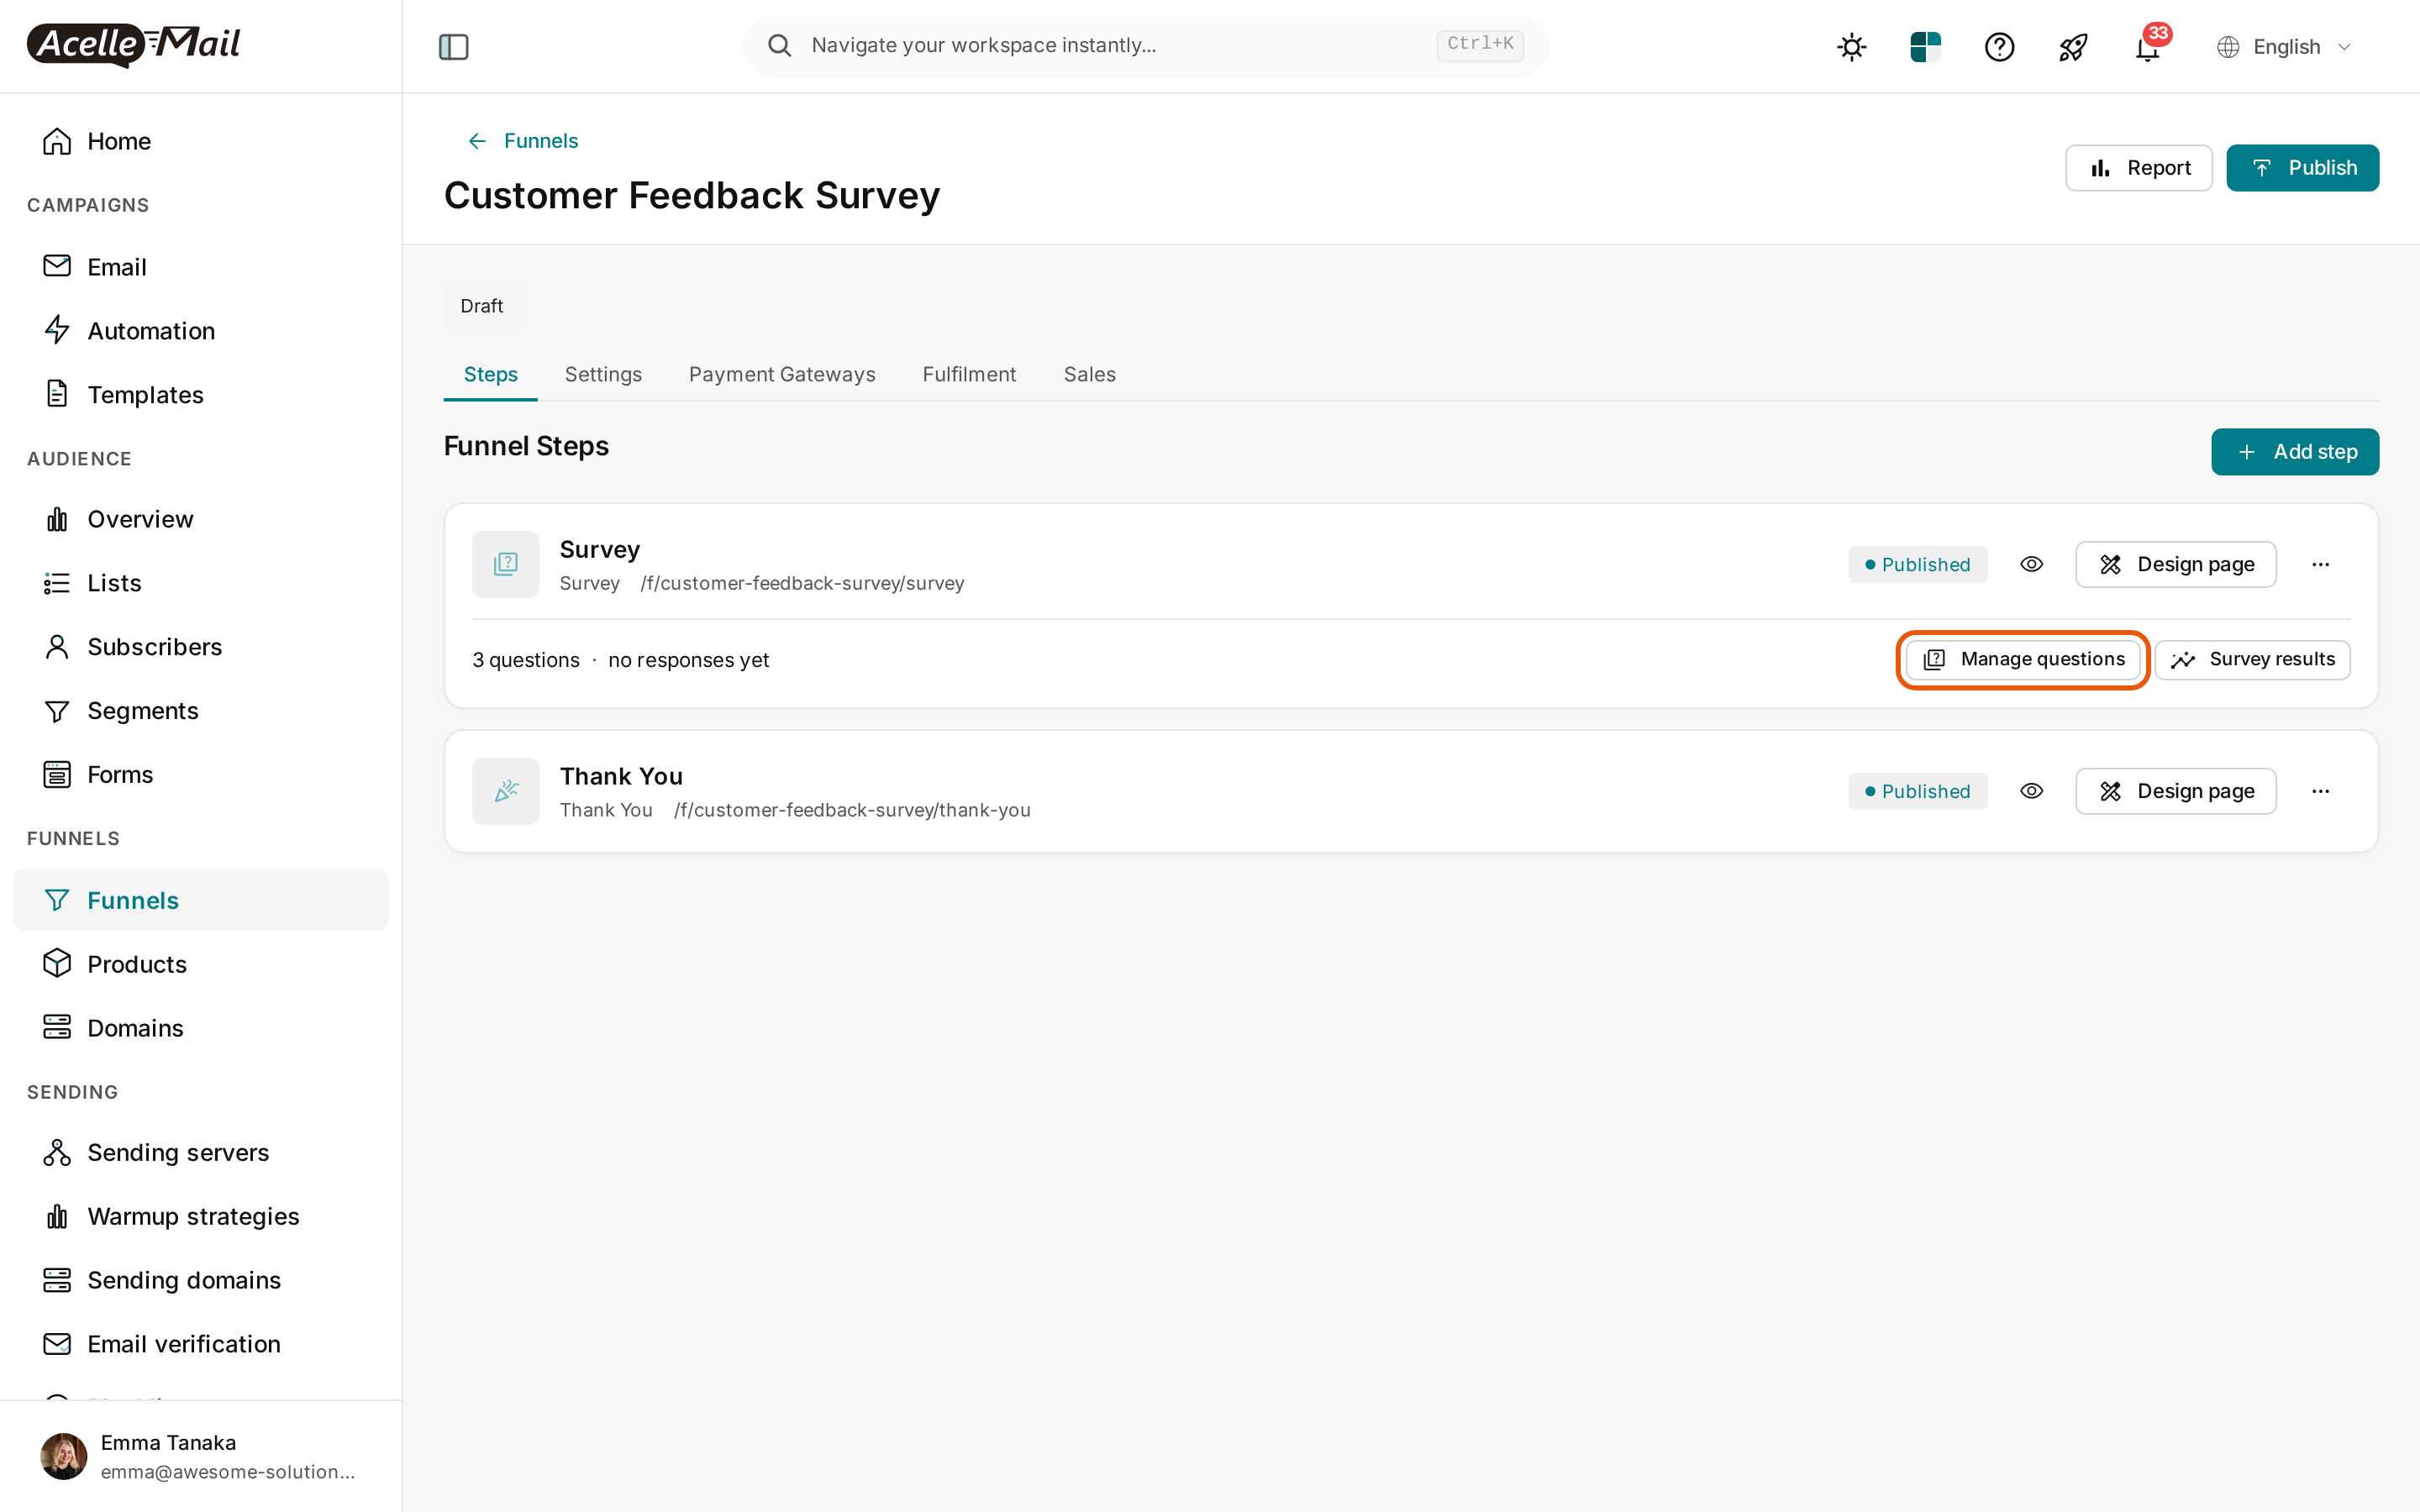
The funnel is still a Draft, so nobody can open its pages yet. You publish it in Step 7.
Step 4 — Review the sample questions#
The Survey questions page lists what visitors answer, in order. The template starts you with three: What is your name? (Short text), How satisfied are you with our service? (Single choice, Required) and Any suggestions for us? (Long text). Click a question to change its text, its help text, whether it is required, or its answer options. Drag the dotted handle on the left to change the order.
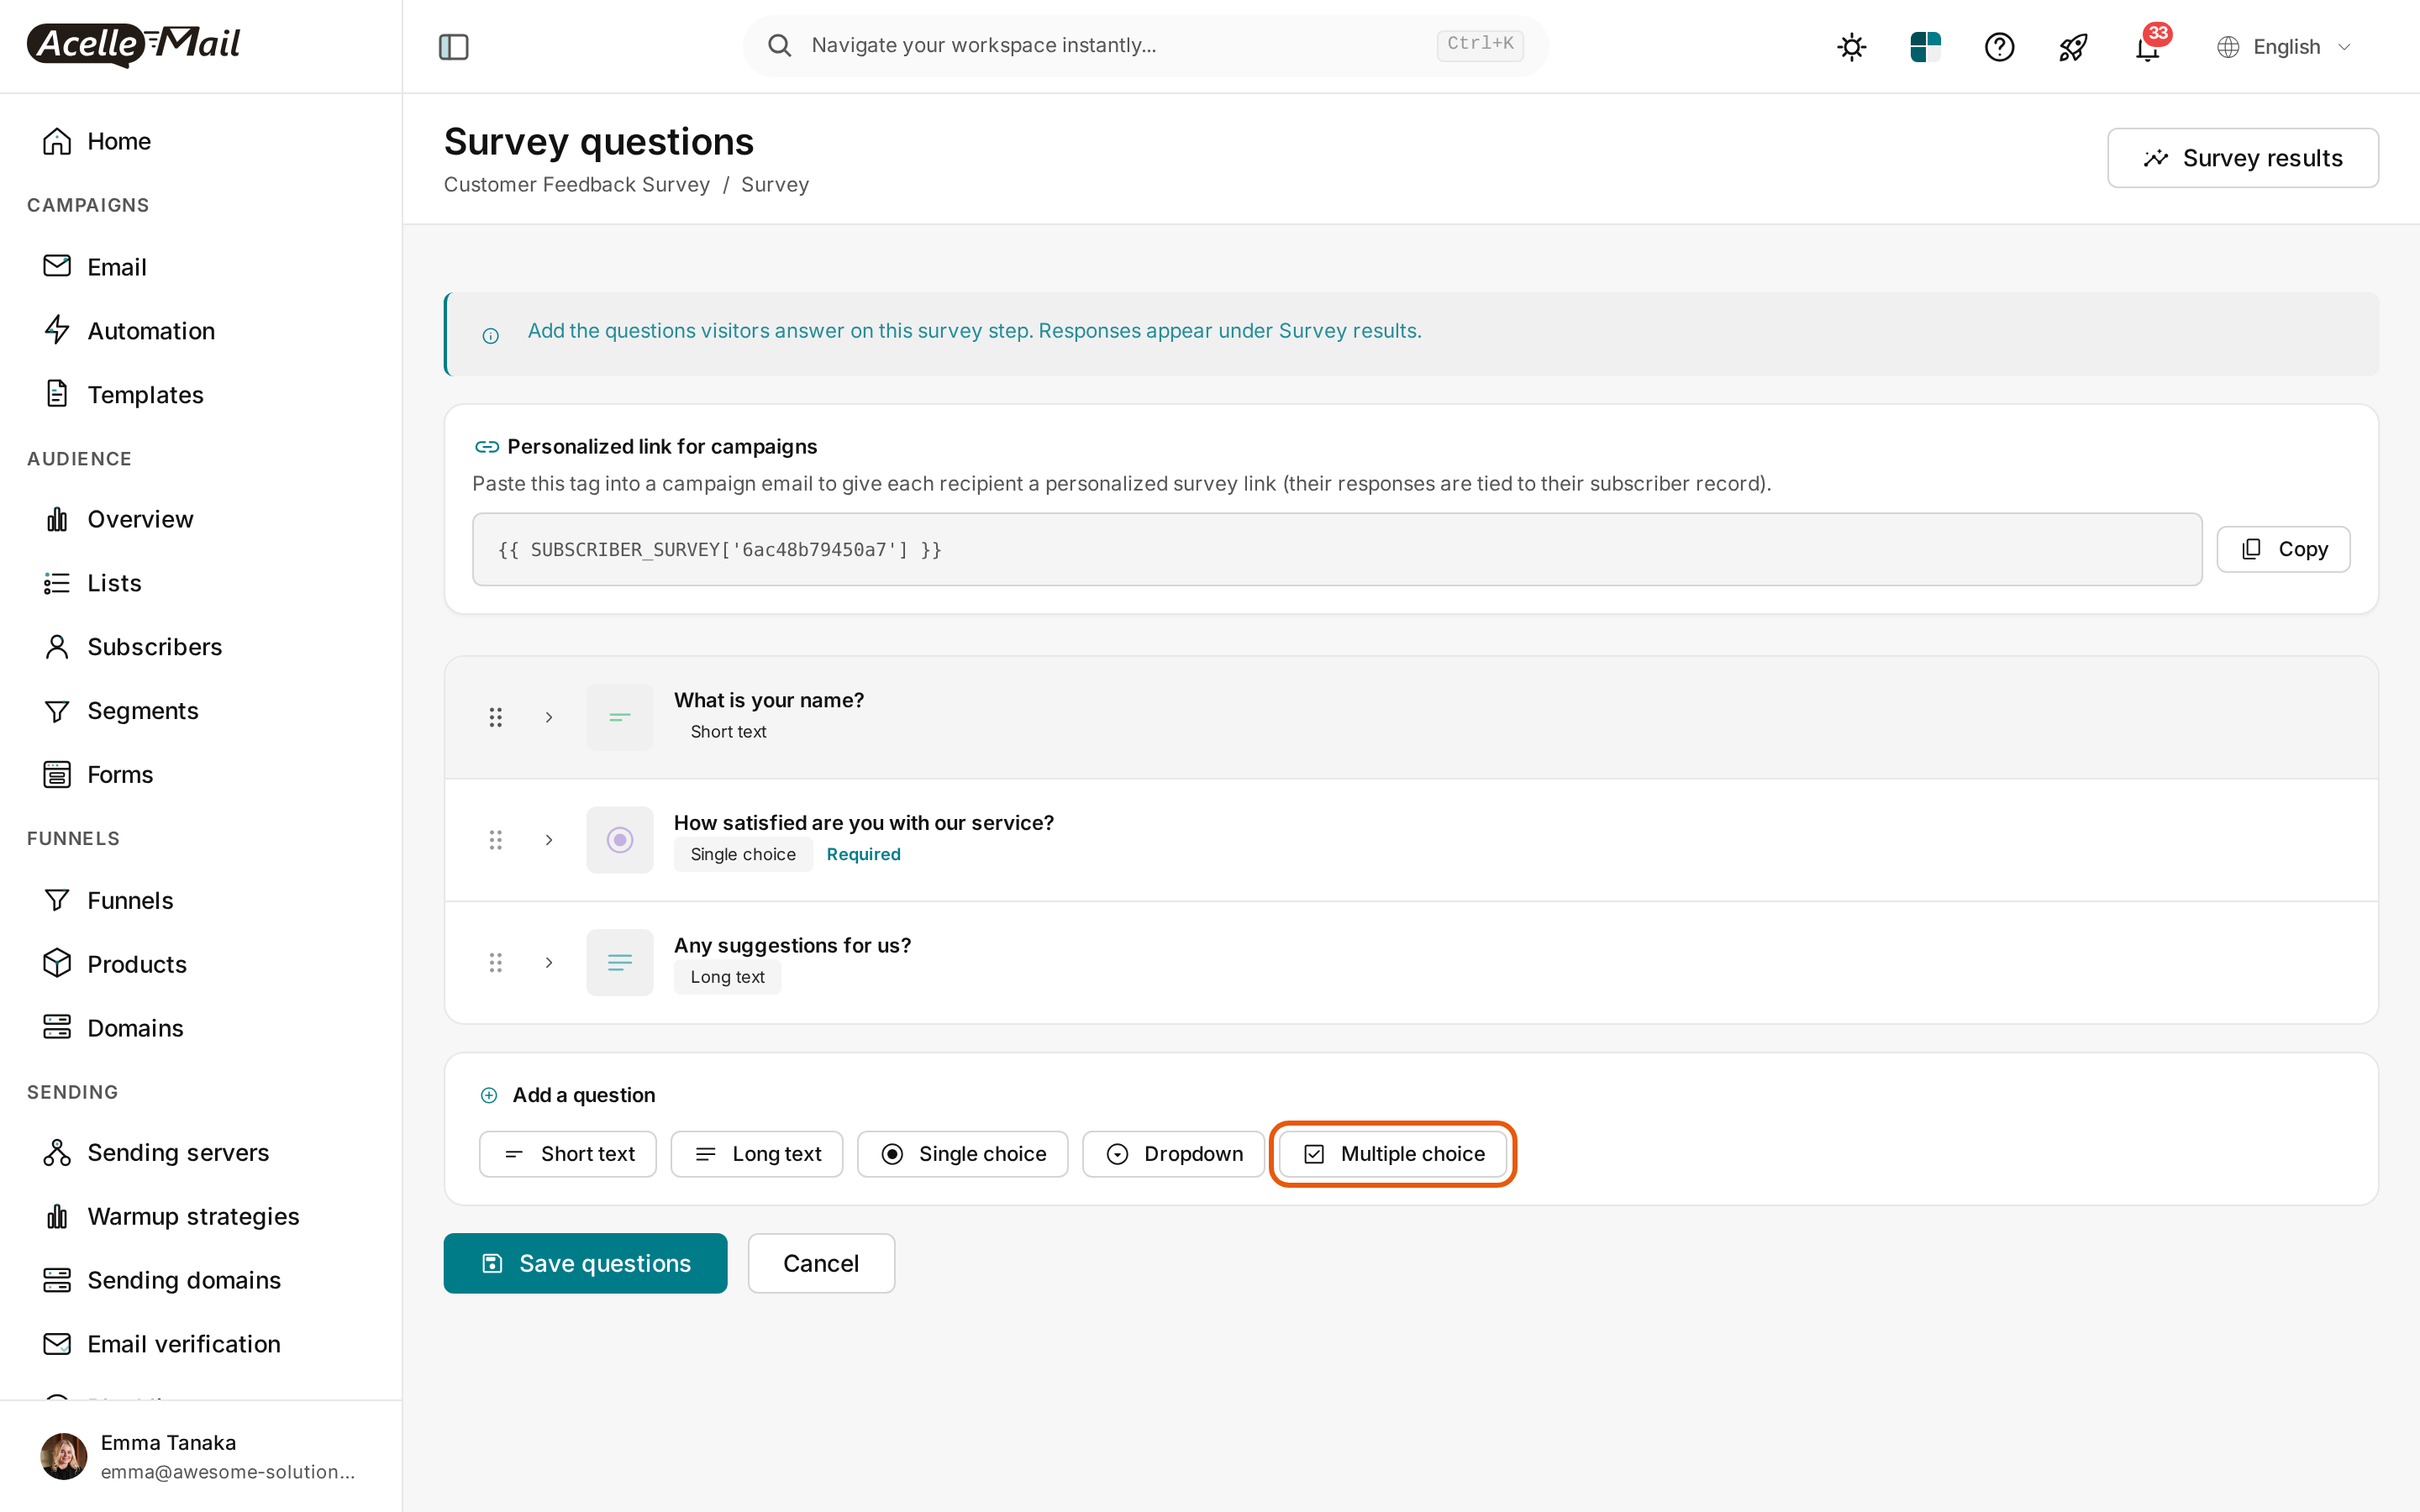
Under Add a question are the five types you can add: Short text, Long text, Single choice, Dropdown and Multiple choice.
Step 5 — Add your own question#
Click Multiple choice. A new question opens at the end of the list. In Question, type Which features do you use? Under Answer options, fill in the two empty options — Campaigns and Automations — then click Add option for a third, Forms. Switch on Required if every visitor must answer it.
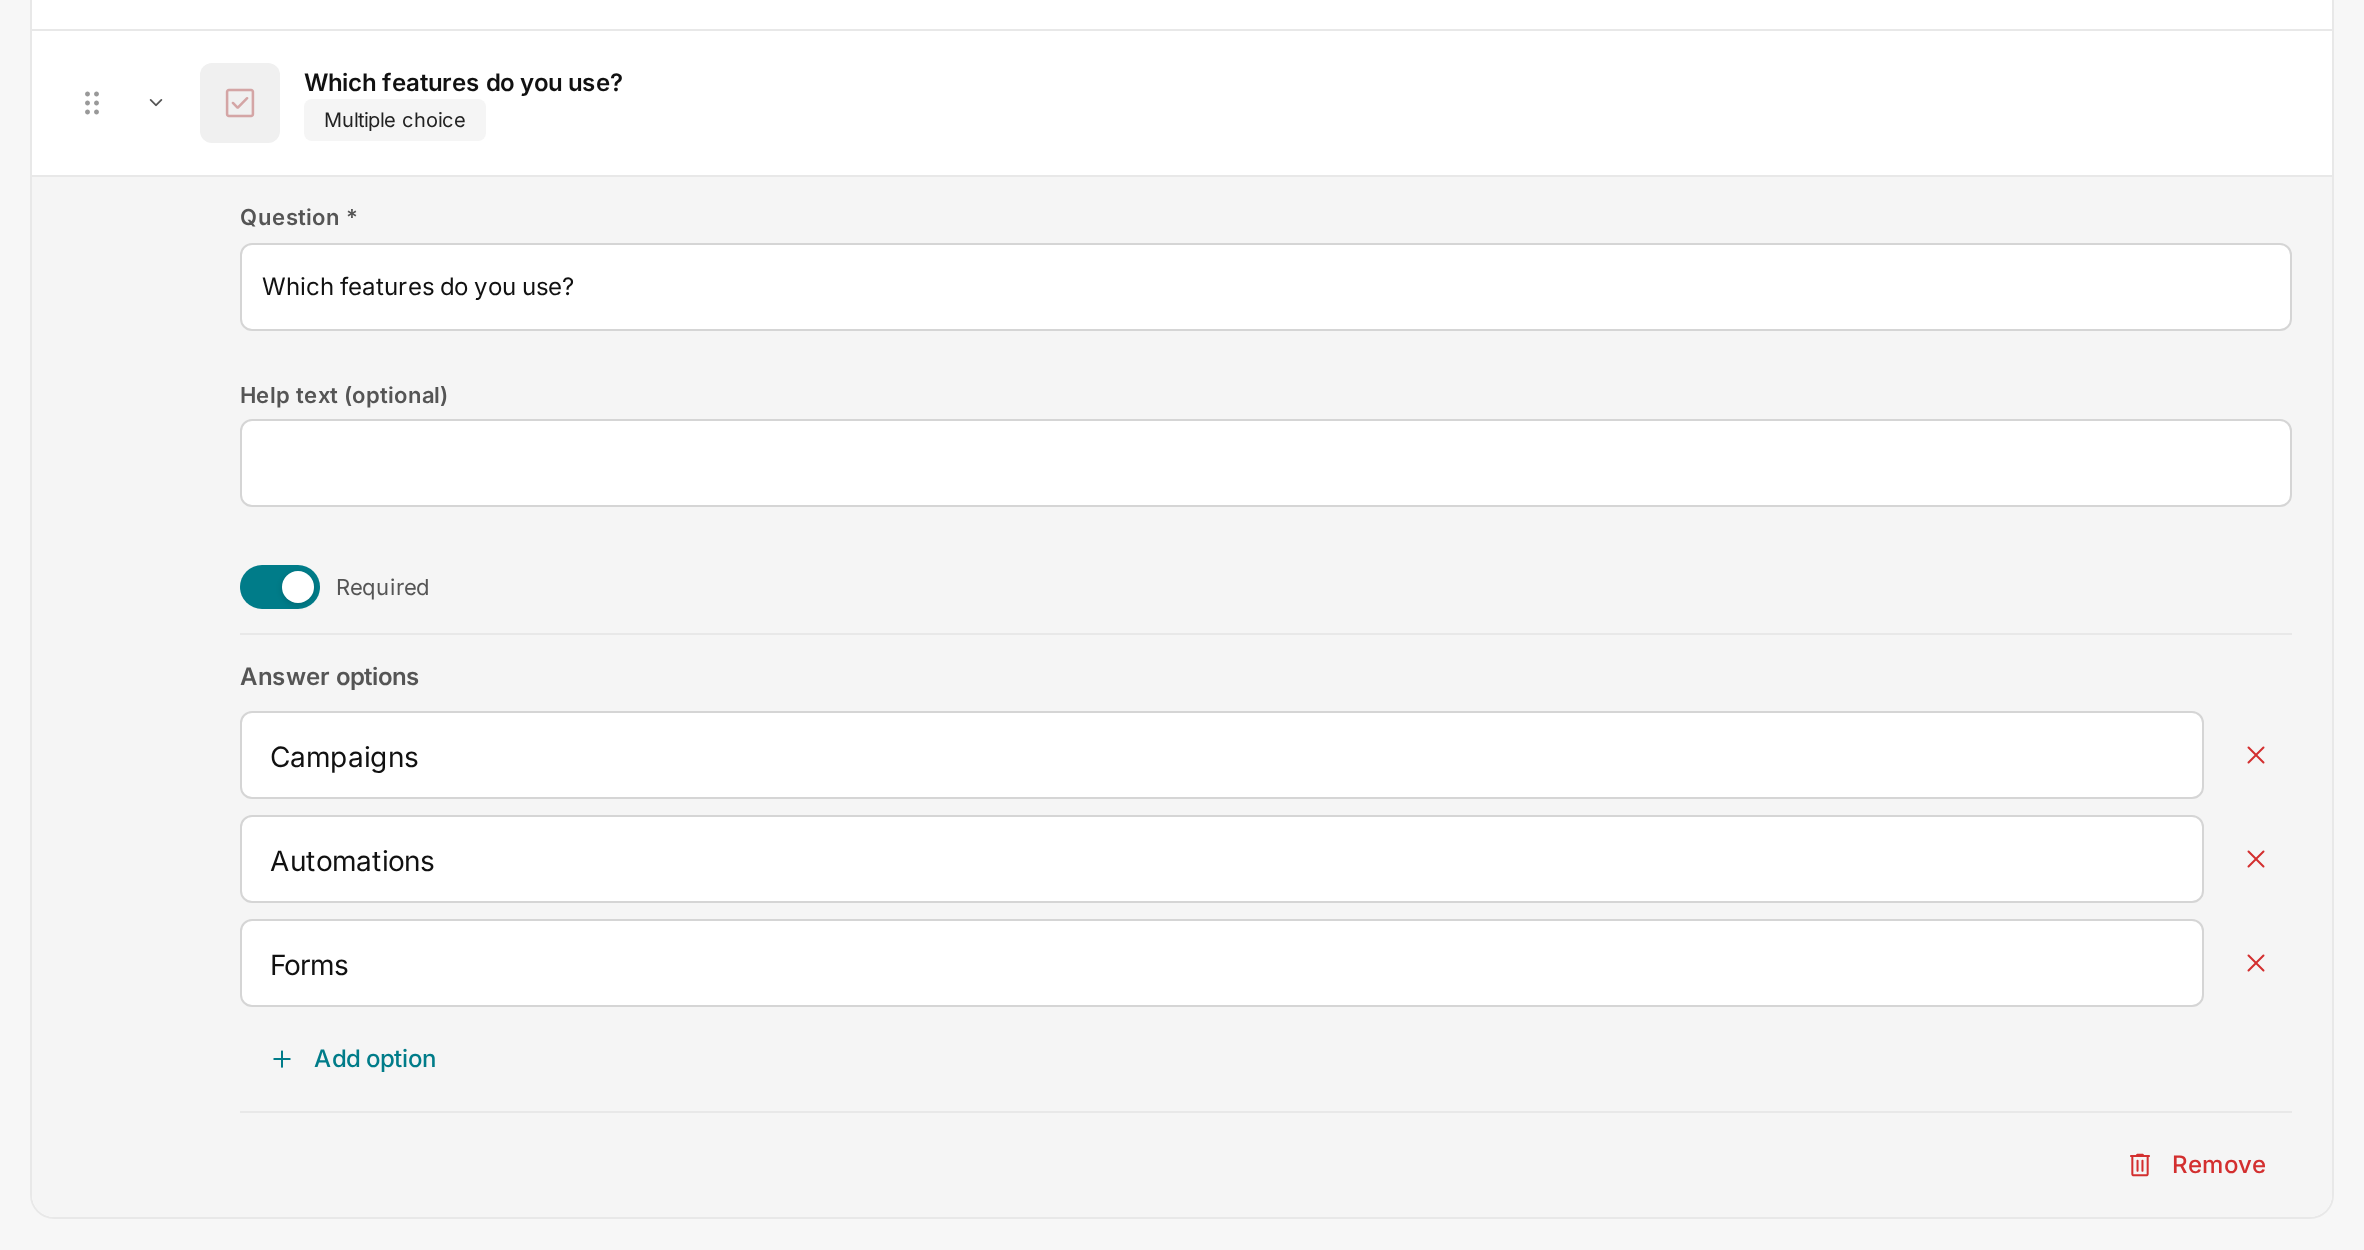
Visitors can tick several options on a Multiple choice question. Single choice and Dropdown take one answer.
Step 6 — Save the questions#
Click Save questions at the bottom. The message Survey questions saved. appears, and the new question shows in the list with its type and the Required label.
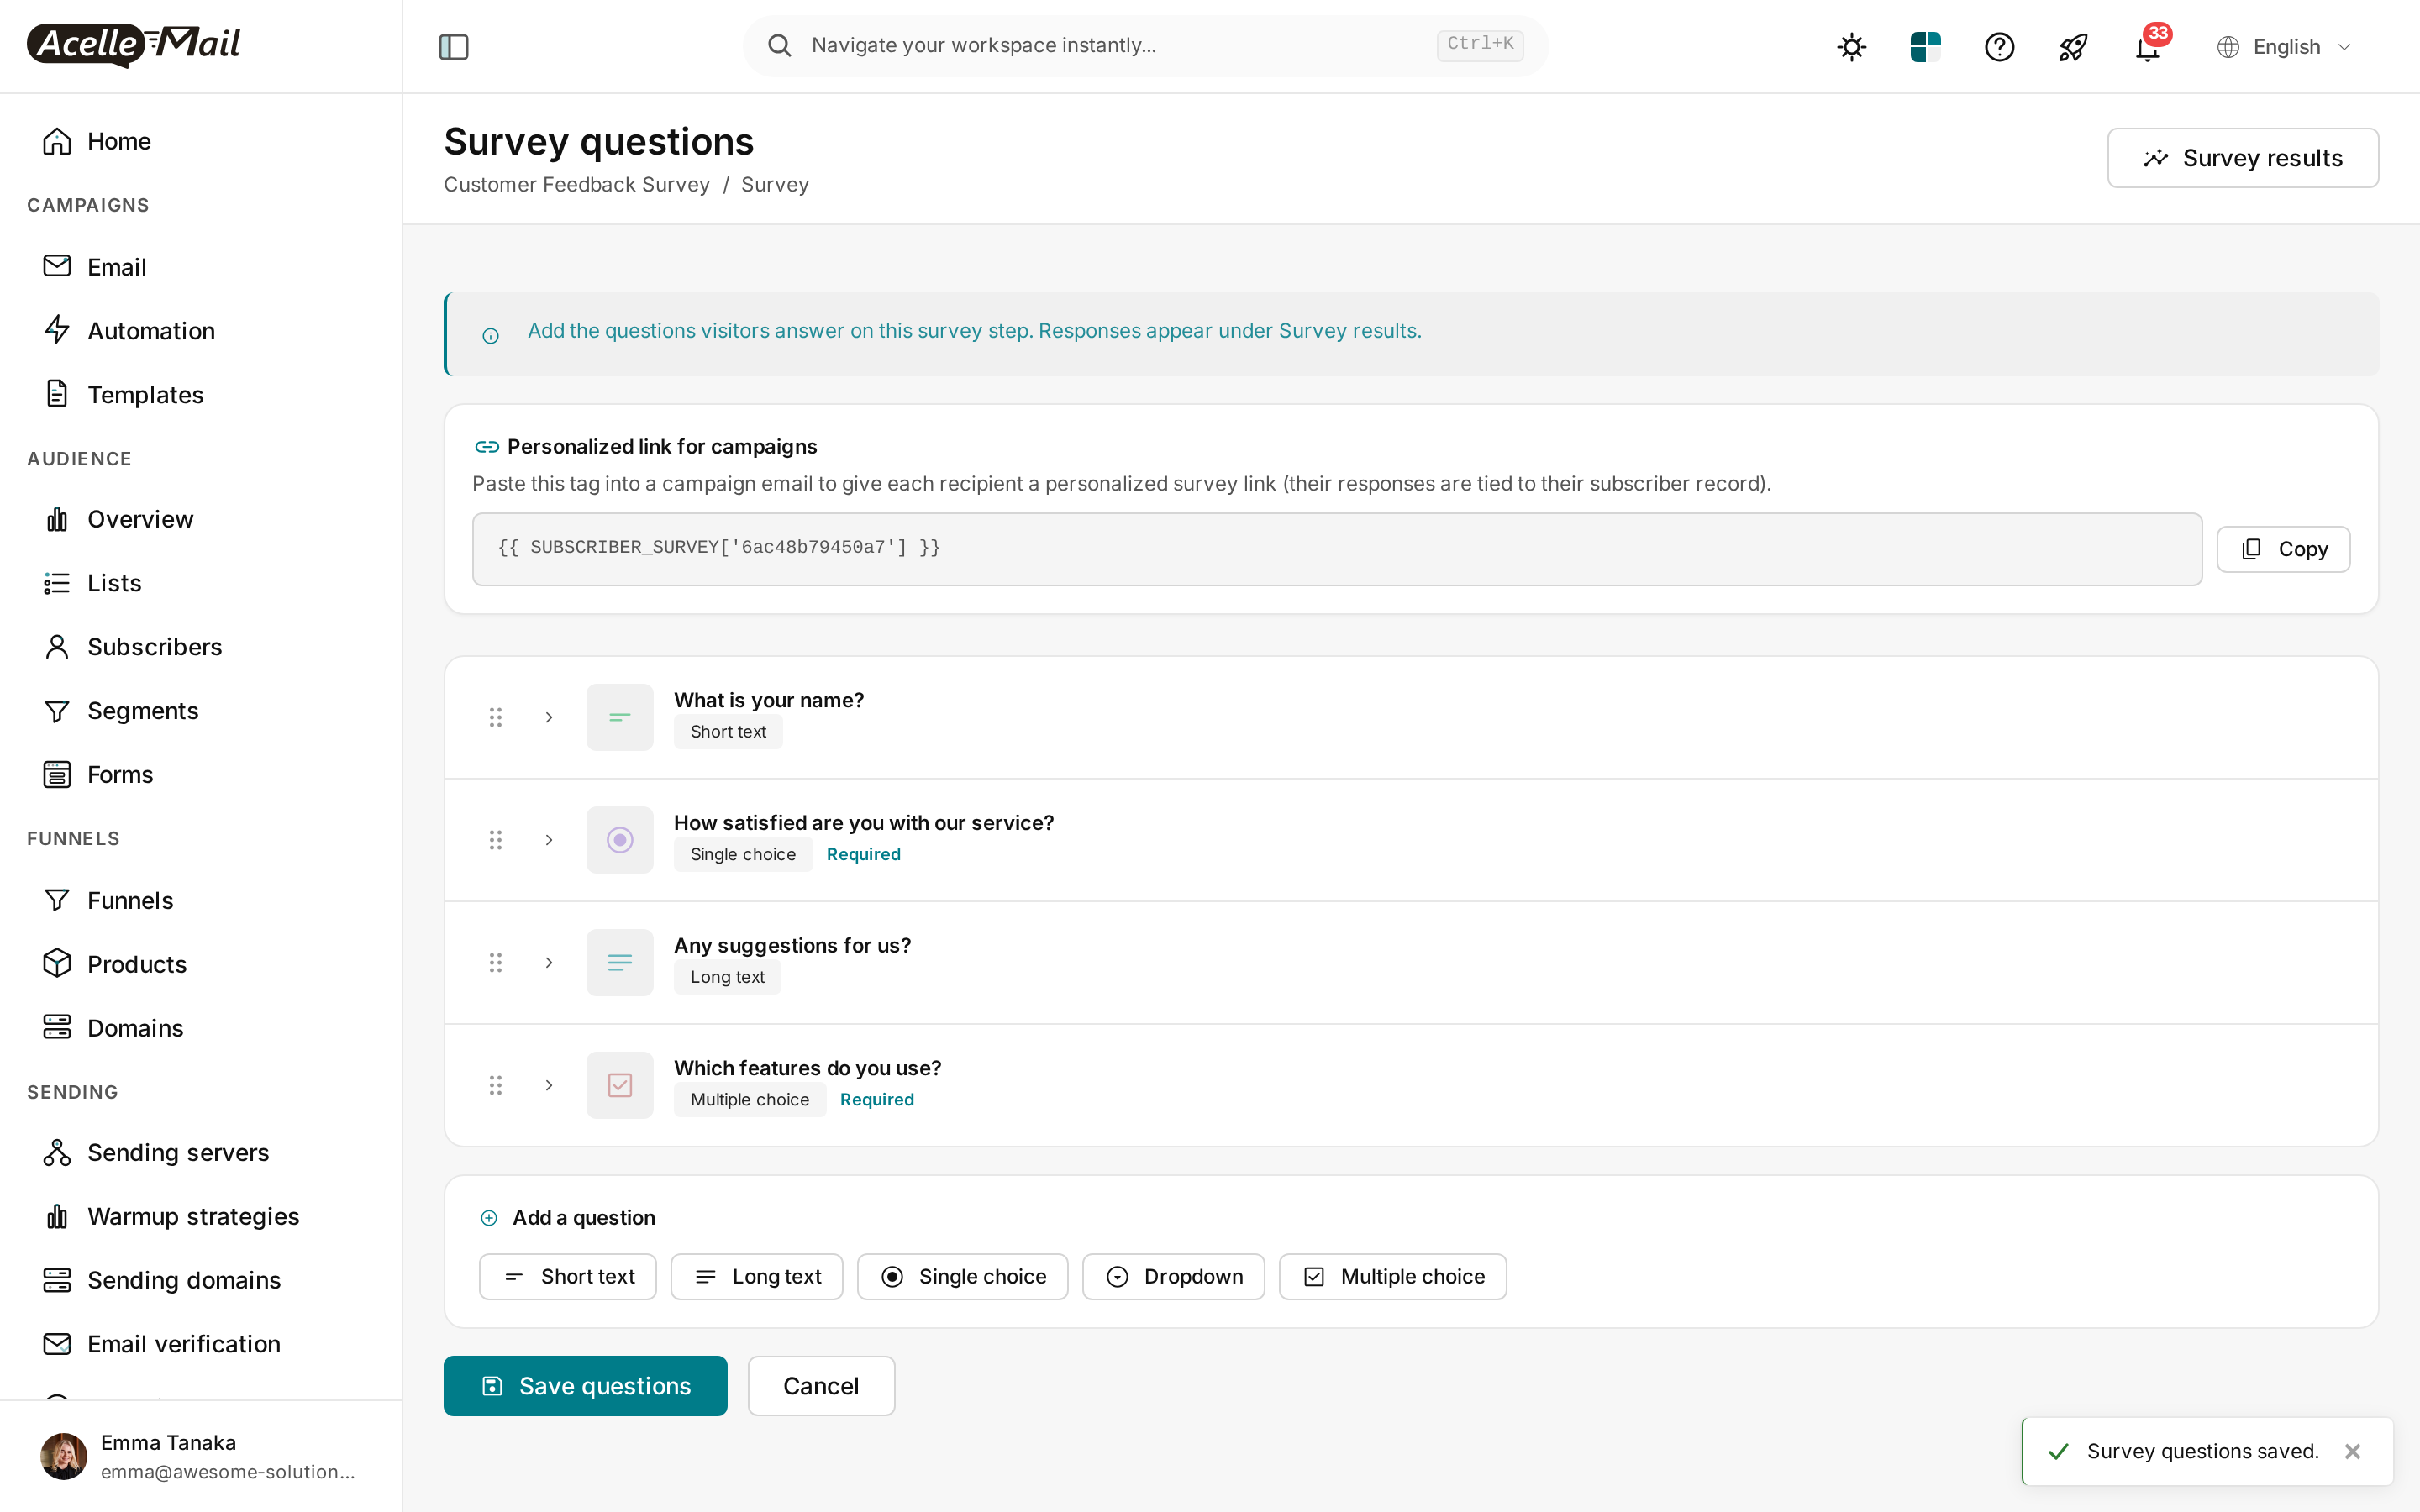
A question you added but did not save is gone when you leave the page.
Step 7 — Publish the funnel#
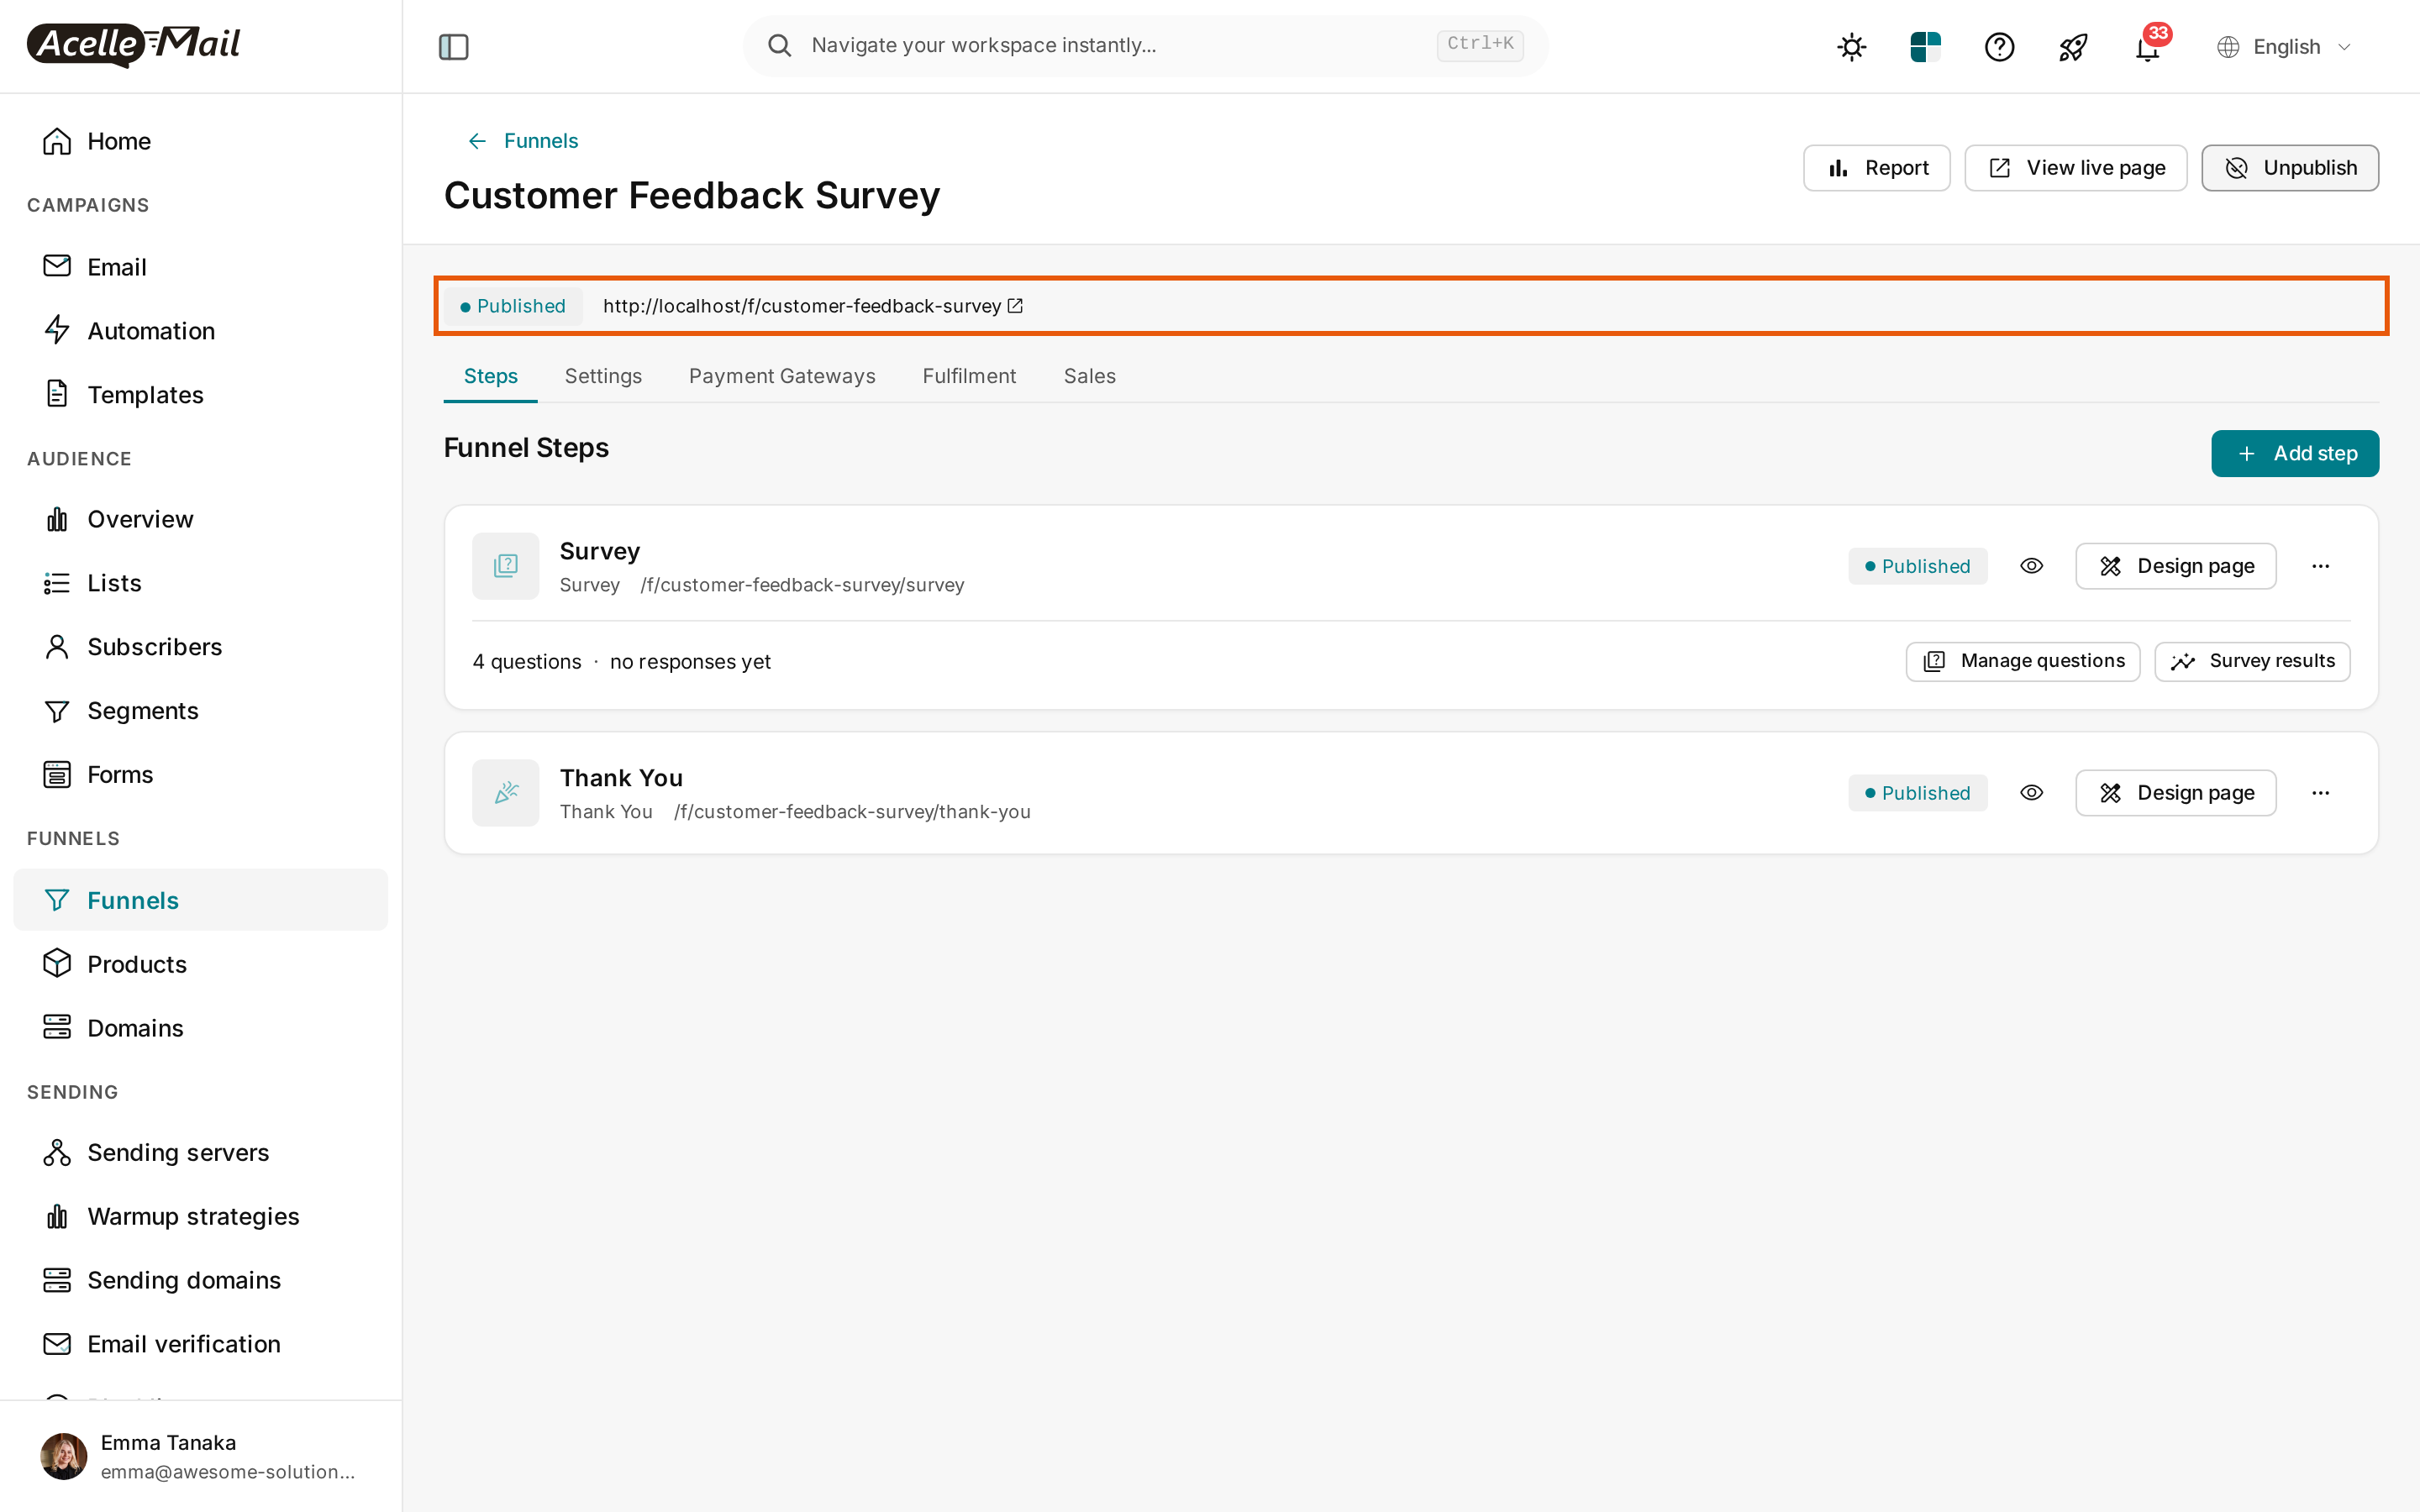
Click the funnel's name at the top of the page to go back to it, then click Publish in the top right. The status changes to Published, with the funnel's address next to it.
Step 8 — Answer the survey as a visitor#
Click View live page. The survey opens in a new tab with every question; a star marks the required ones. Fill it in and click Submit.
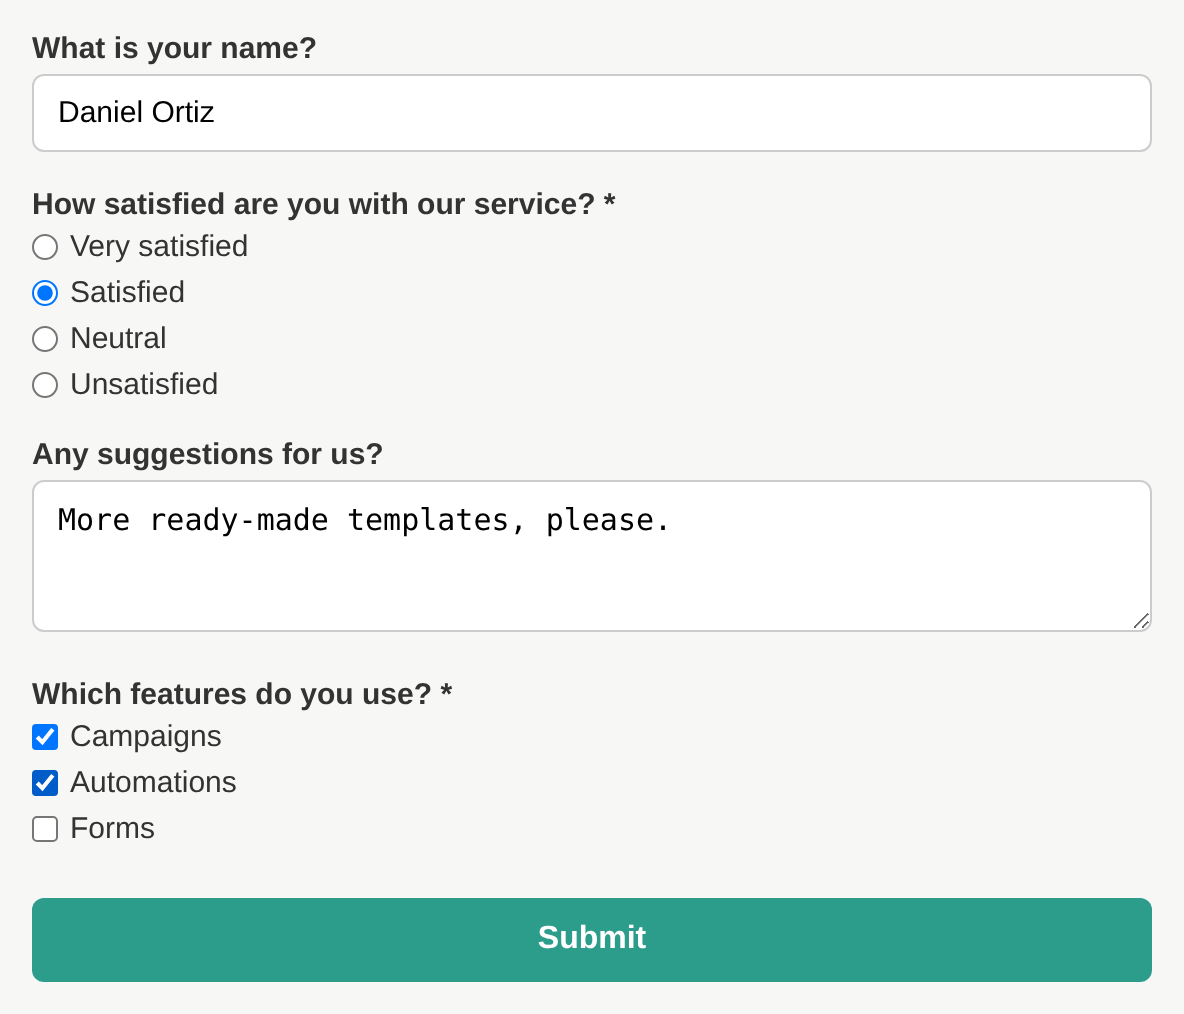
A required question left empty stops the form: the browser points at it, or a message above the questions names it (see Common issues).
Step 9 — See the thank-you page#
After Submit, the visitor lands on the funnel's Thank You page.
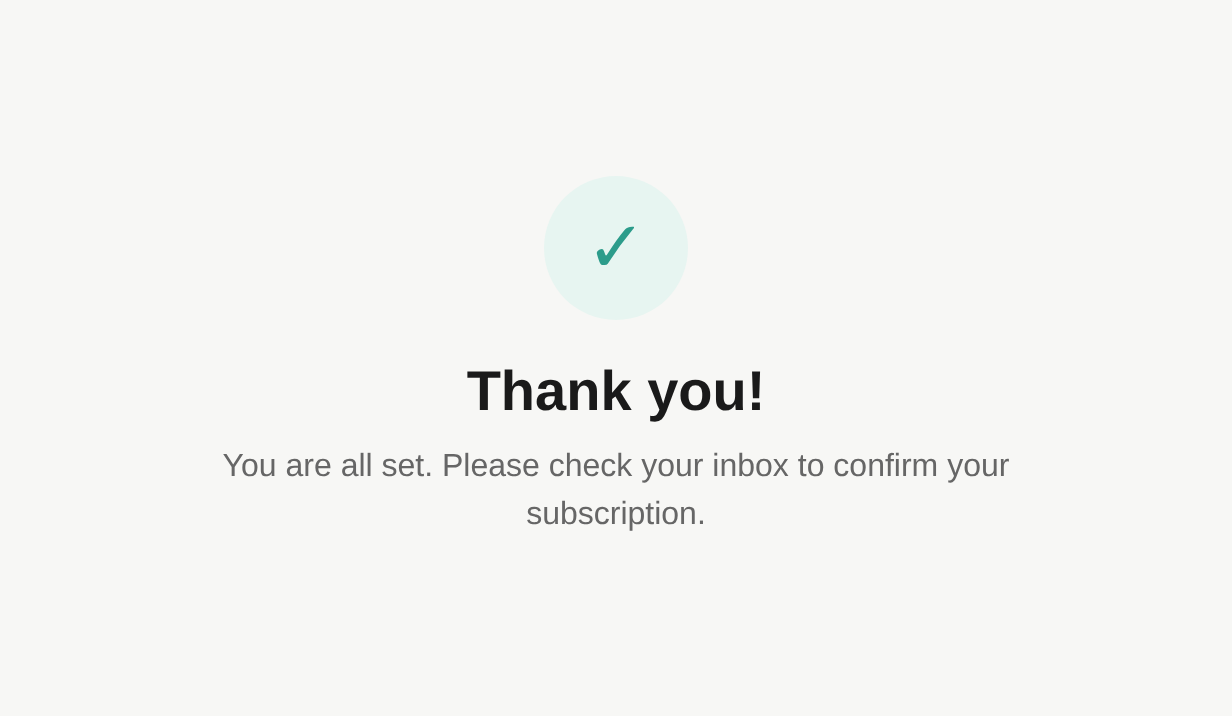
The text on it comes with the template and asks the visitor to confirm a subscription, which does not fit a survey. To write your own, go back to the funnel's Steps tab and click Design page on the Thank You step.
Step 10 — Send subscribers a personal link#
Open Manage questions again. At the top, Personalized link for campaigns holds a tag like {{ SUBSCRIBER_SURVEY['…'] }}. Click Copy and paste the tag into your campaign email where the link should appear, for example after Tell us what you think:.

When the campaign is sent, the tag becomes each recipient's own link to the survey. Answers sent through it carry the subscriber's email on the results screen. Answers sent from the plain address show as Anonymous.
Step 11 — Read the answers#
On the funnel's Steps tab, click Survey results under the Survey step. Three numbers sit at the top: Responses (every survey submitted), Identified (those submitted through a personal link) and Questions. Below, each question has its own card. Text questions list the most recent answers. Choice questions show a bar for each option with its share and count.
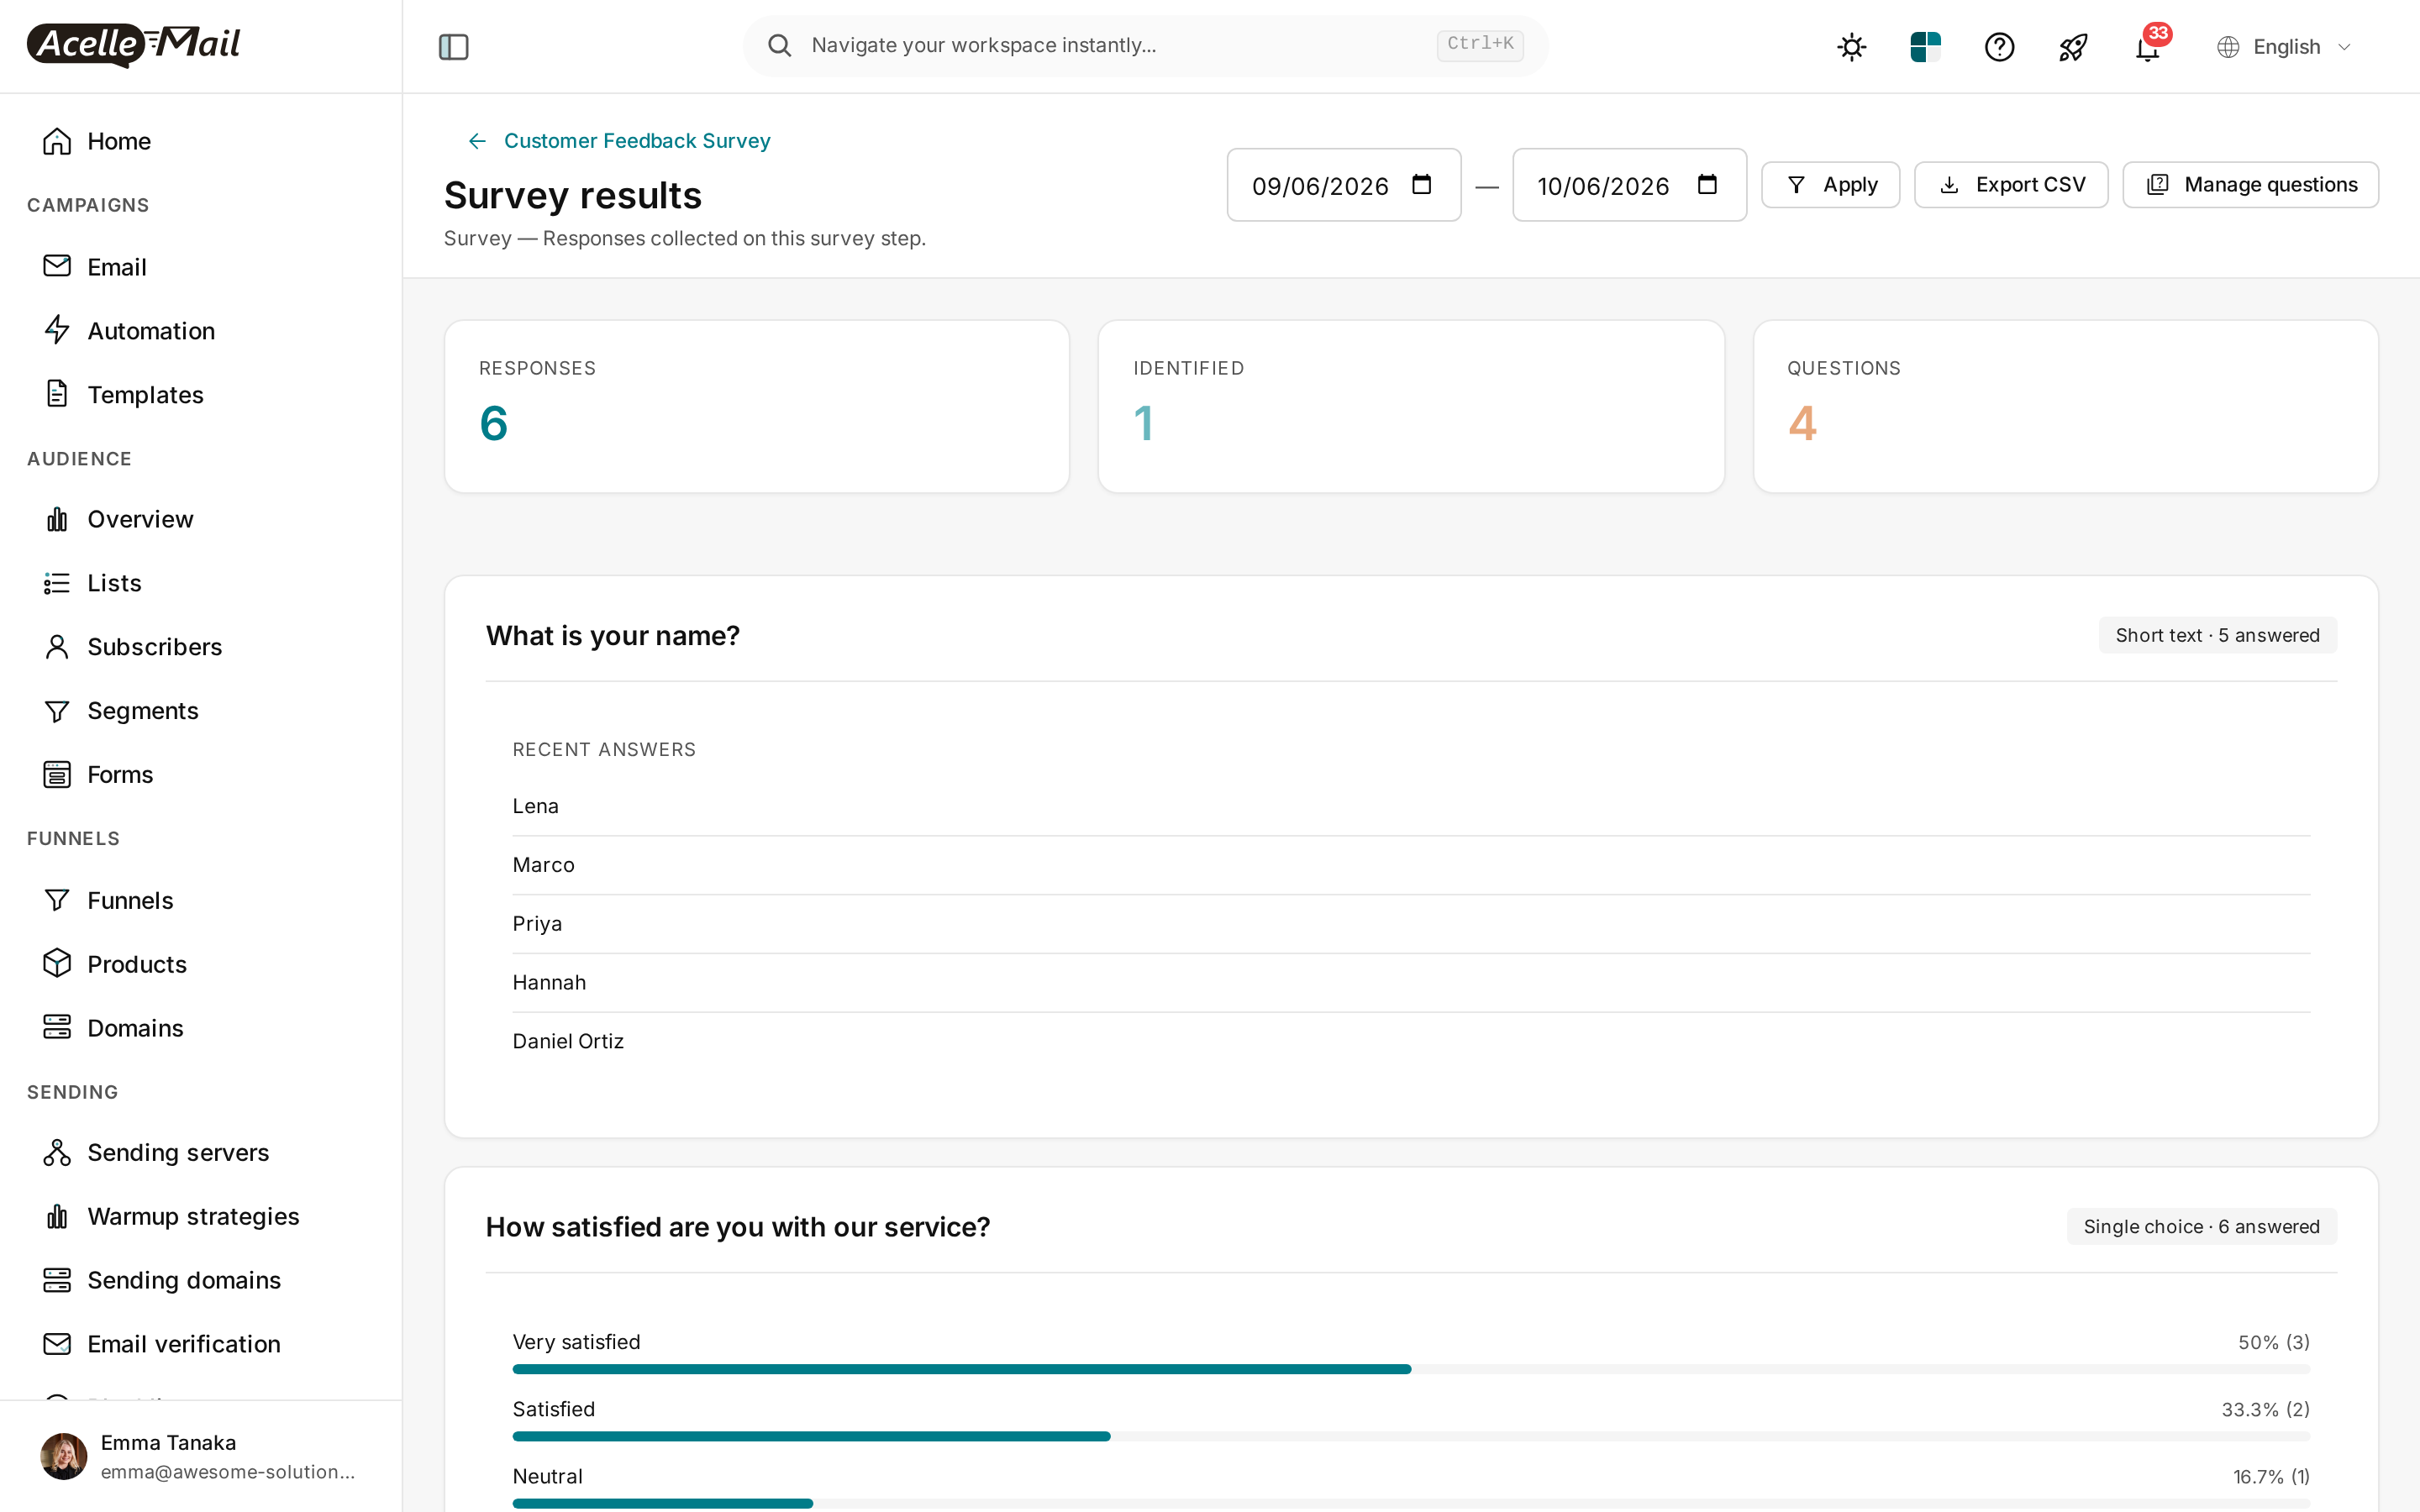
The two dates at the top limit the page to a period, the last 30 days by default. Change them and click Apply.
Step 12 — Look at each response, or export them#
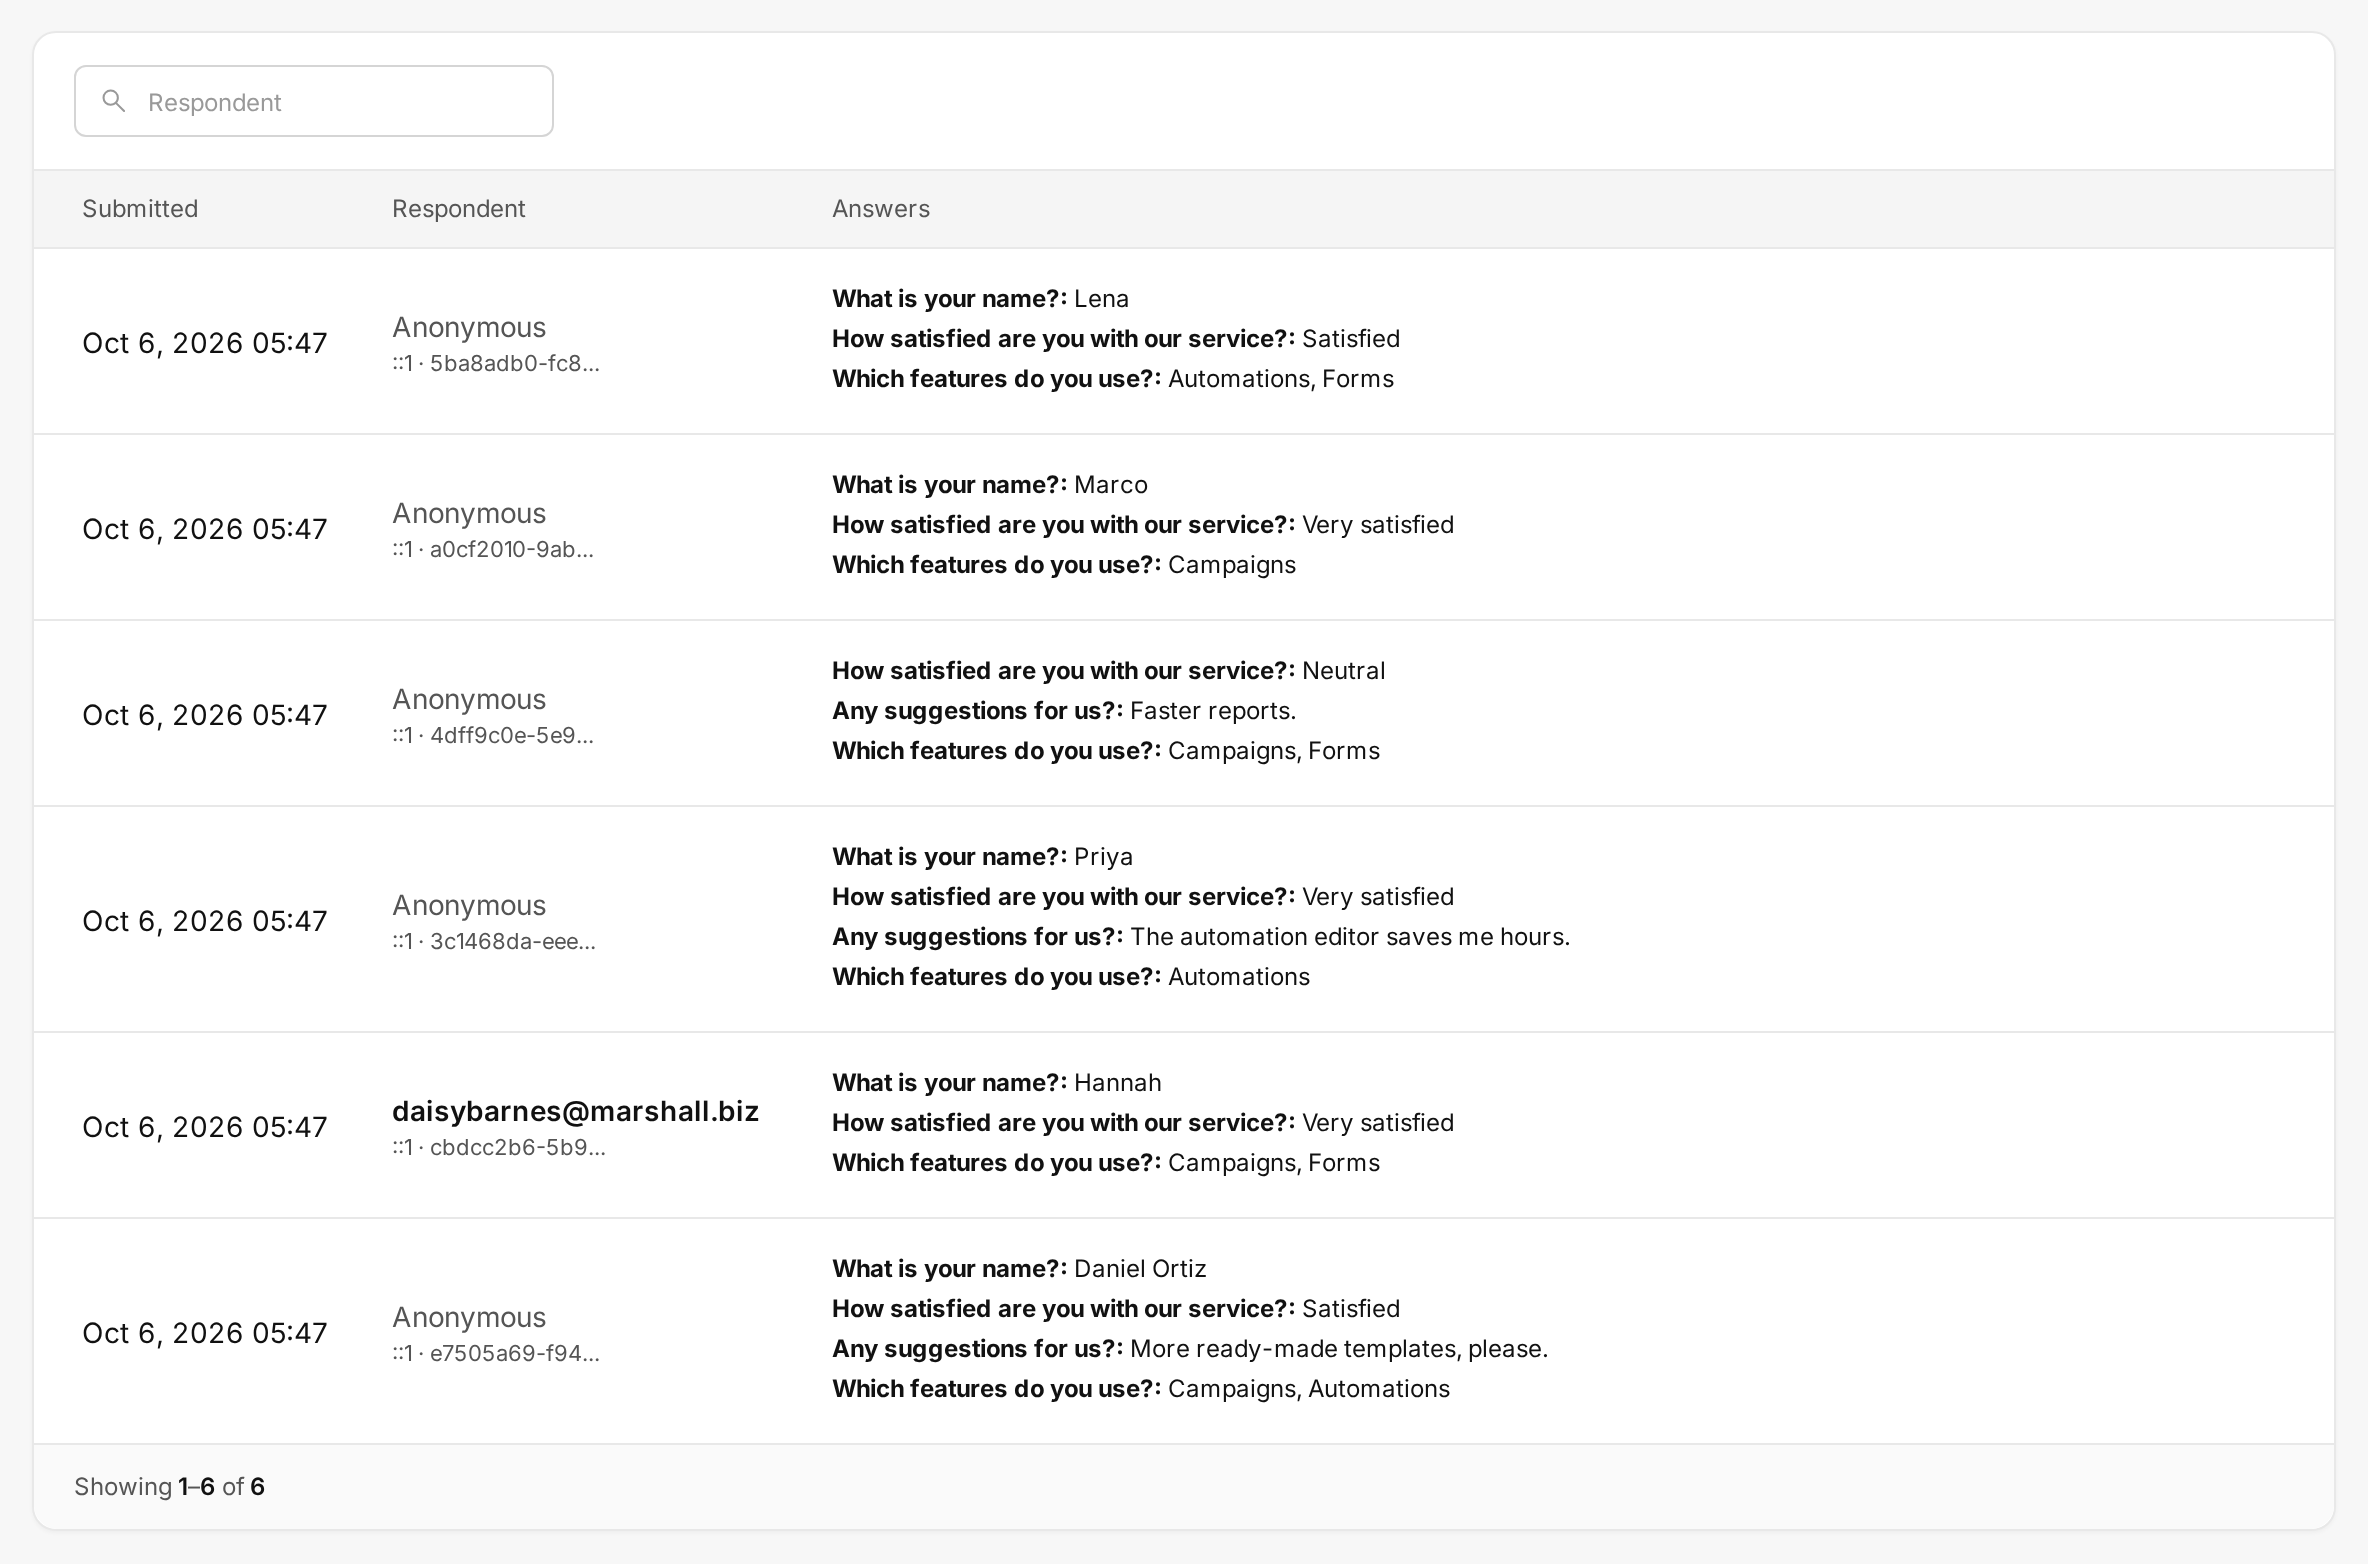
At the bottom of the same page, every response has its own row: when it was sent, who sent it (the subscriber's email, or Anonymous) and all its answers. Type an email in the search box to find one respondent.
To work with the answers in a spreadsheet, click Export CSV at the top of the page. The file has one row per response and one column per question, for the dates you chose.
Step 13 — Check the funnel report#
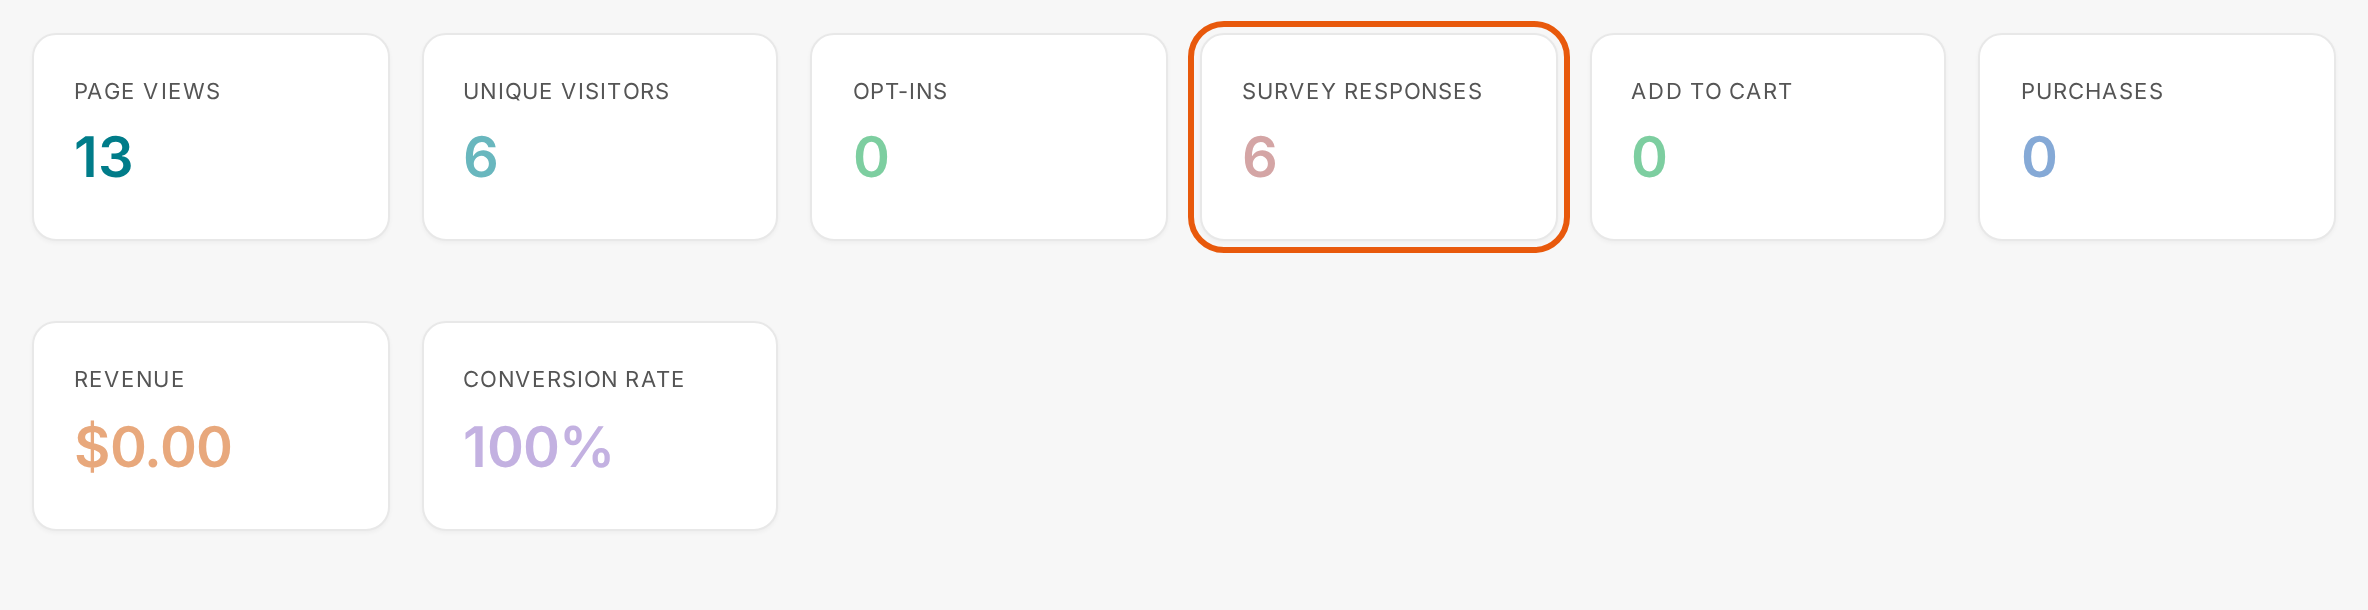
Back on the funnel, click Report at the top. The Survey responses card counts the surveys submitted in the chosen dates, next to page views and visitors. Click the card to open Survey results.
Common issues#
| What you see |
What to do |
| FUNNELS is missing from the left menu |
Funnels are switched off on your installation. Ask whoever manages your server to add FUNNEL_ENABLED=true to the application's .env file. |
| The survey's address shows a 404 page |
The funnel is still a Draft. Open it and click Publish (Step 7). |
| "Survey unavailable — this step has no questions yet. Add them in the funnel editor." on the survey page |
The survey has no questions. Open Manage questions, add at least one and click Save questions. Until then, the Survey step on the Steps tab says No questions yet. |
| "The Which features do you use? field is required." above the questions |
A required question was left empty. Answer it and click Submit again. To make a question optional, open it in Manage questions and switch off Required. |
| A subscriber's answer shows as Anonymous |
They opened the plain address, for example from a forwarded email, not their personal link. Also, when the funnel's Settings tab has a Subscriber list chosen, only subscribers of that list are recognized: choose the list your campaign goes to. |
| The thank-you page asks visitors to confirm a subscription |
That text comes with the template. Click Design page on the Thank You step and write your own. |
What to do after#
